
When numerous documents flow in, segregating them becomes labour-intensive. To automate it using AI, Staple AI launched Labelling. Invoice, purchase order, and delivery note classification is a great example in retail. In the Insurance industry, it can be classifying claims, hospital bills, outpatient receipts, and settlement invoices. Now, let's check out how Staple AI automates classification.
Labels in Staple AI automatically classify and route documents to the correct queues. Instead of manually sorting invoices, purchase orders, receipts, or claims, Labels can automatically
- Identify document type
- Apply the correct label
- Trigger actions (e.g., move to another queue, notify users, trigger webhook)
This reduces manual sorting and speeds up document processing workflows. For example, we'll classify invoices, purchase orders and delivery notes.
The classification flow has four main components.
- Models – Guide the tool on what and how to capture
- Queues – Where documents are uploaded and processed
- Labels – Tags applied to documents
- Rules – Logic that determines when labels are applied
Once configured,
- A document is uploaded to a classifier queue
- The system detects its classification
- A rule applies the correct label
- The label triggers an action (e.g., move to another queue)
Create models
Go to Models screen and click the "+ NEW MODEL" to create a model called "Document Classifier". (Also, please refer to this page on how to create models)
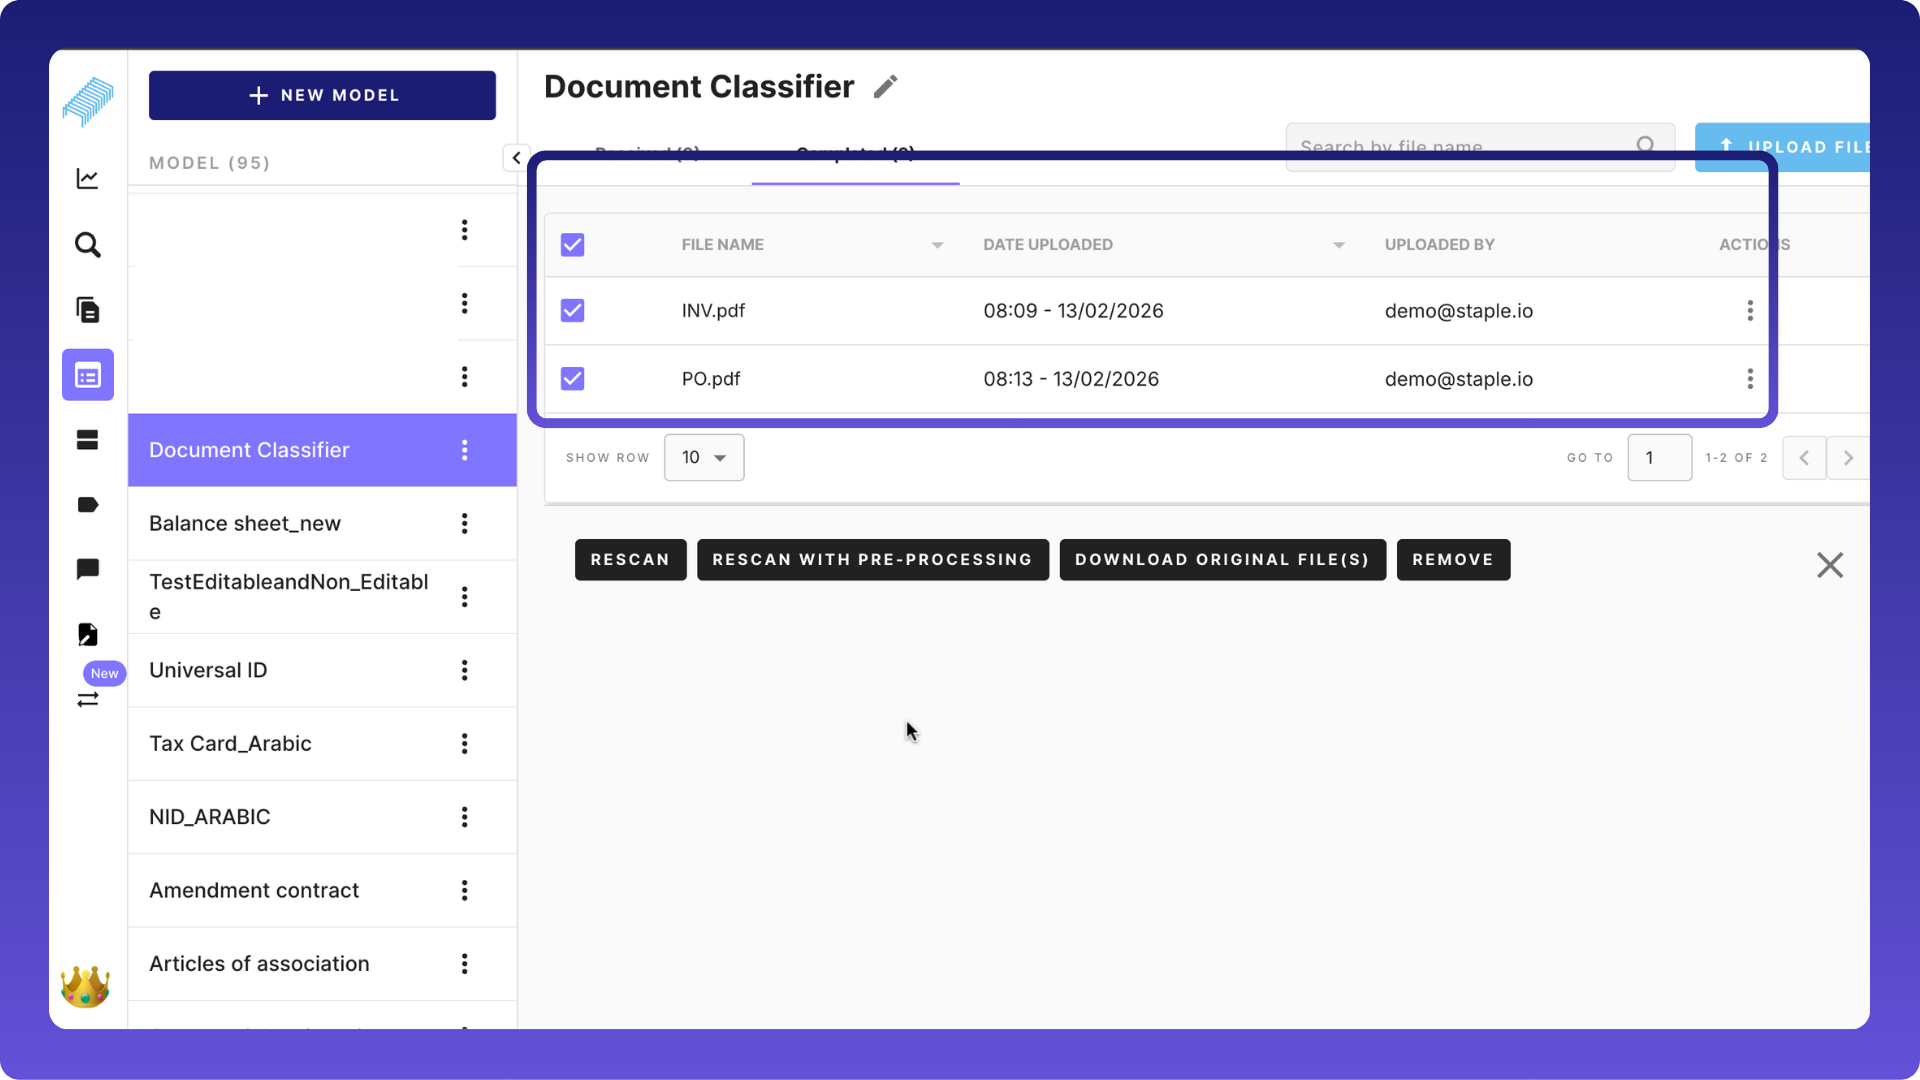
Upload an invoice and a purchase order to train the AI
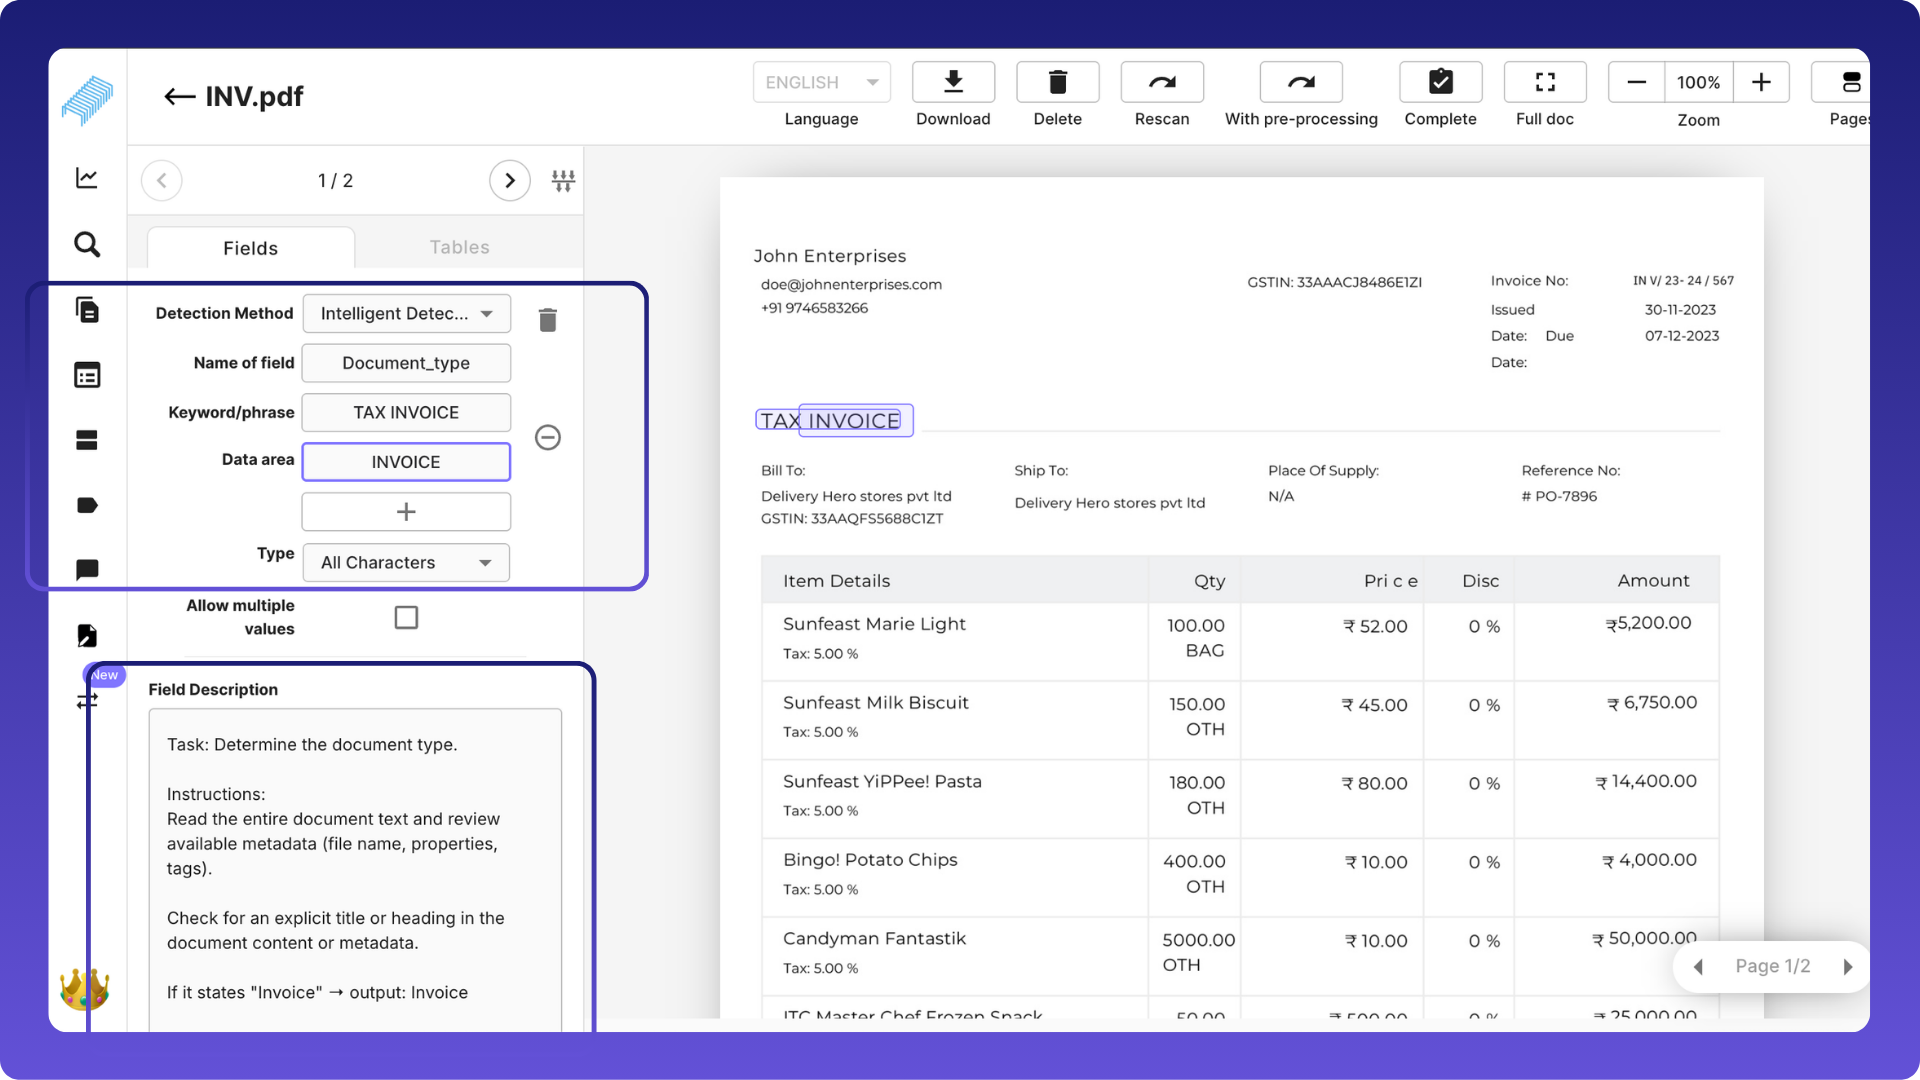
Create a field "Document_Type" as showcased in the image below. Also, add a detailed field description(character limit 1024). This guides the AI to extract the right information from the document and help classify.
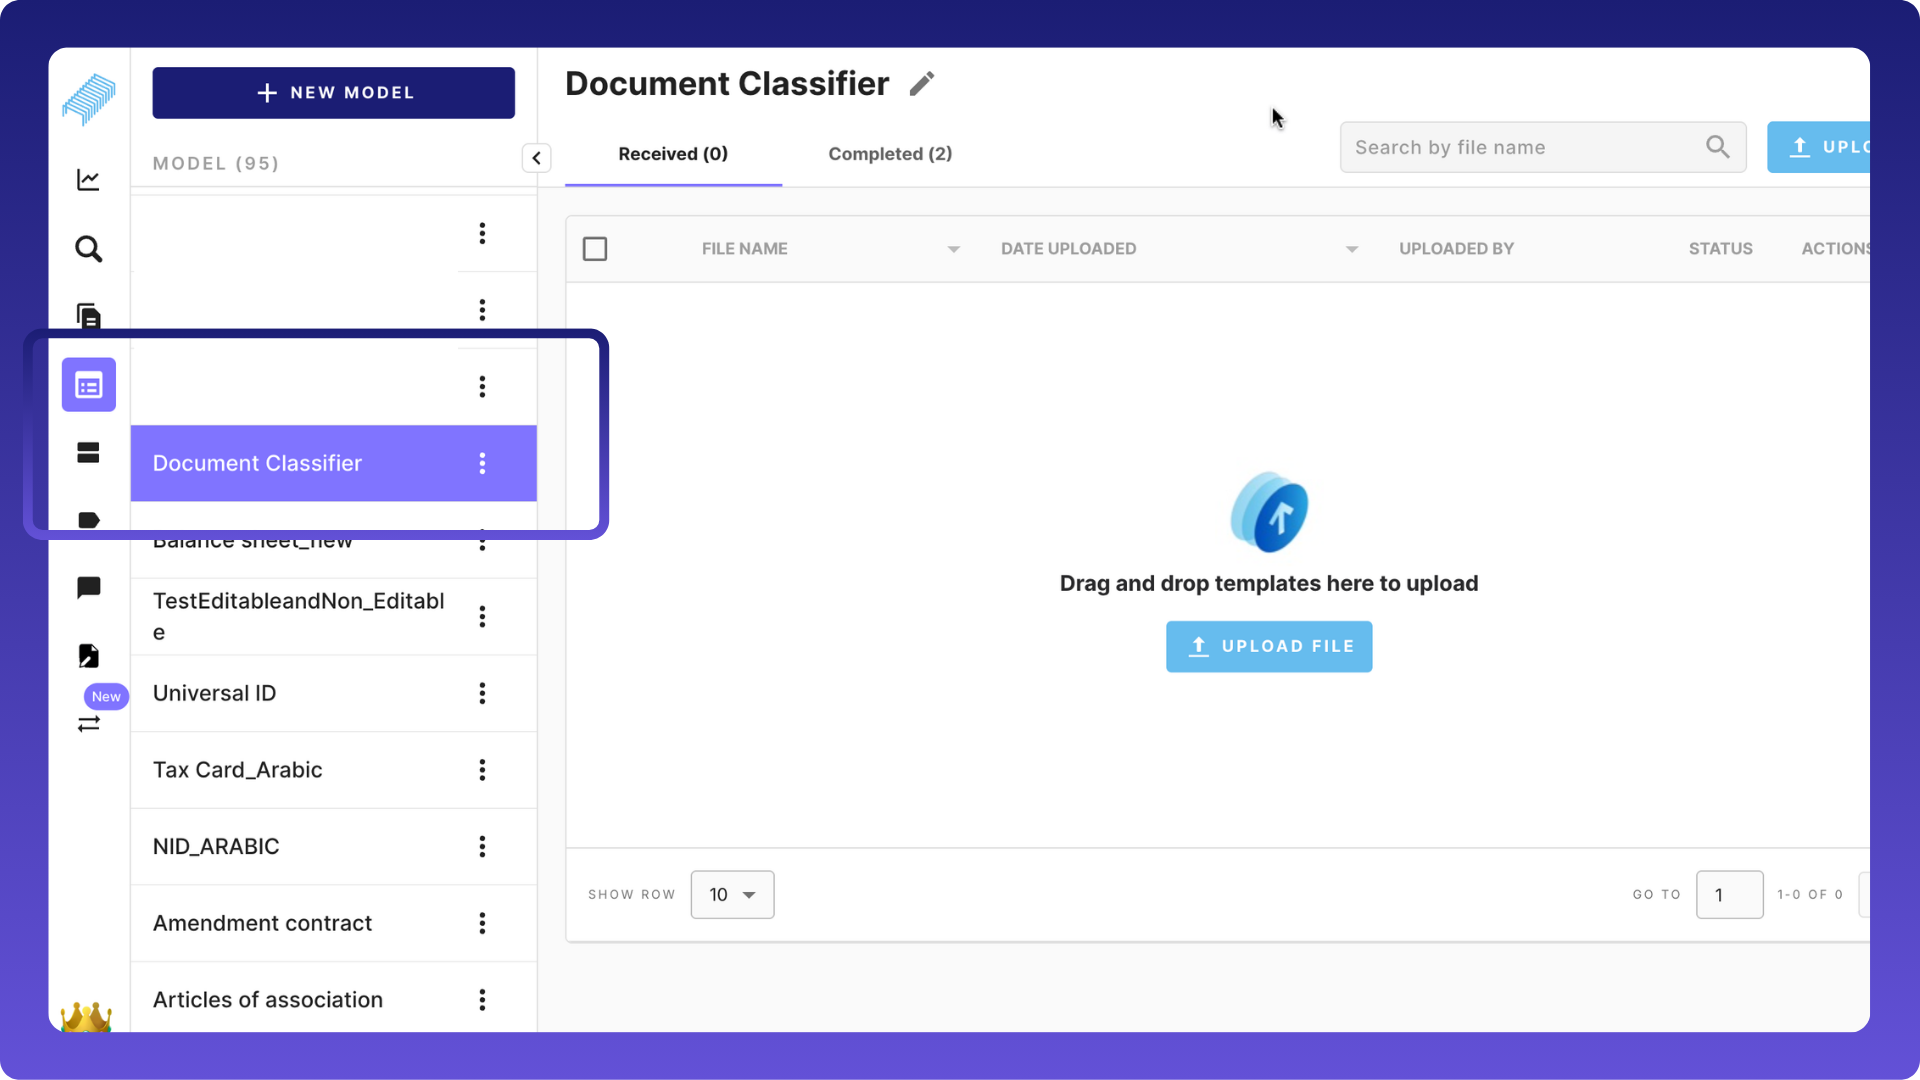
Create Queues
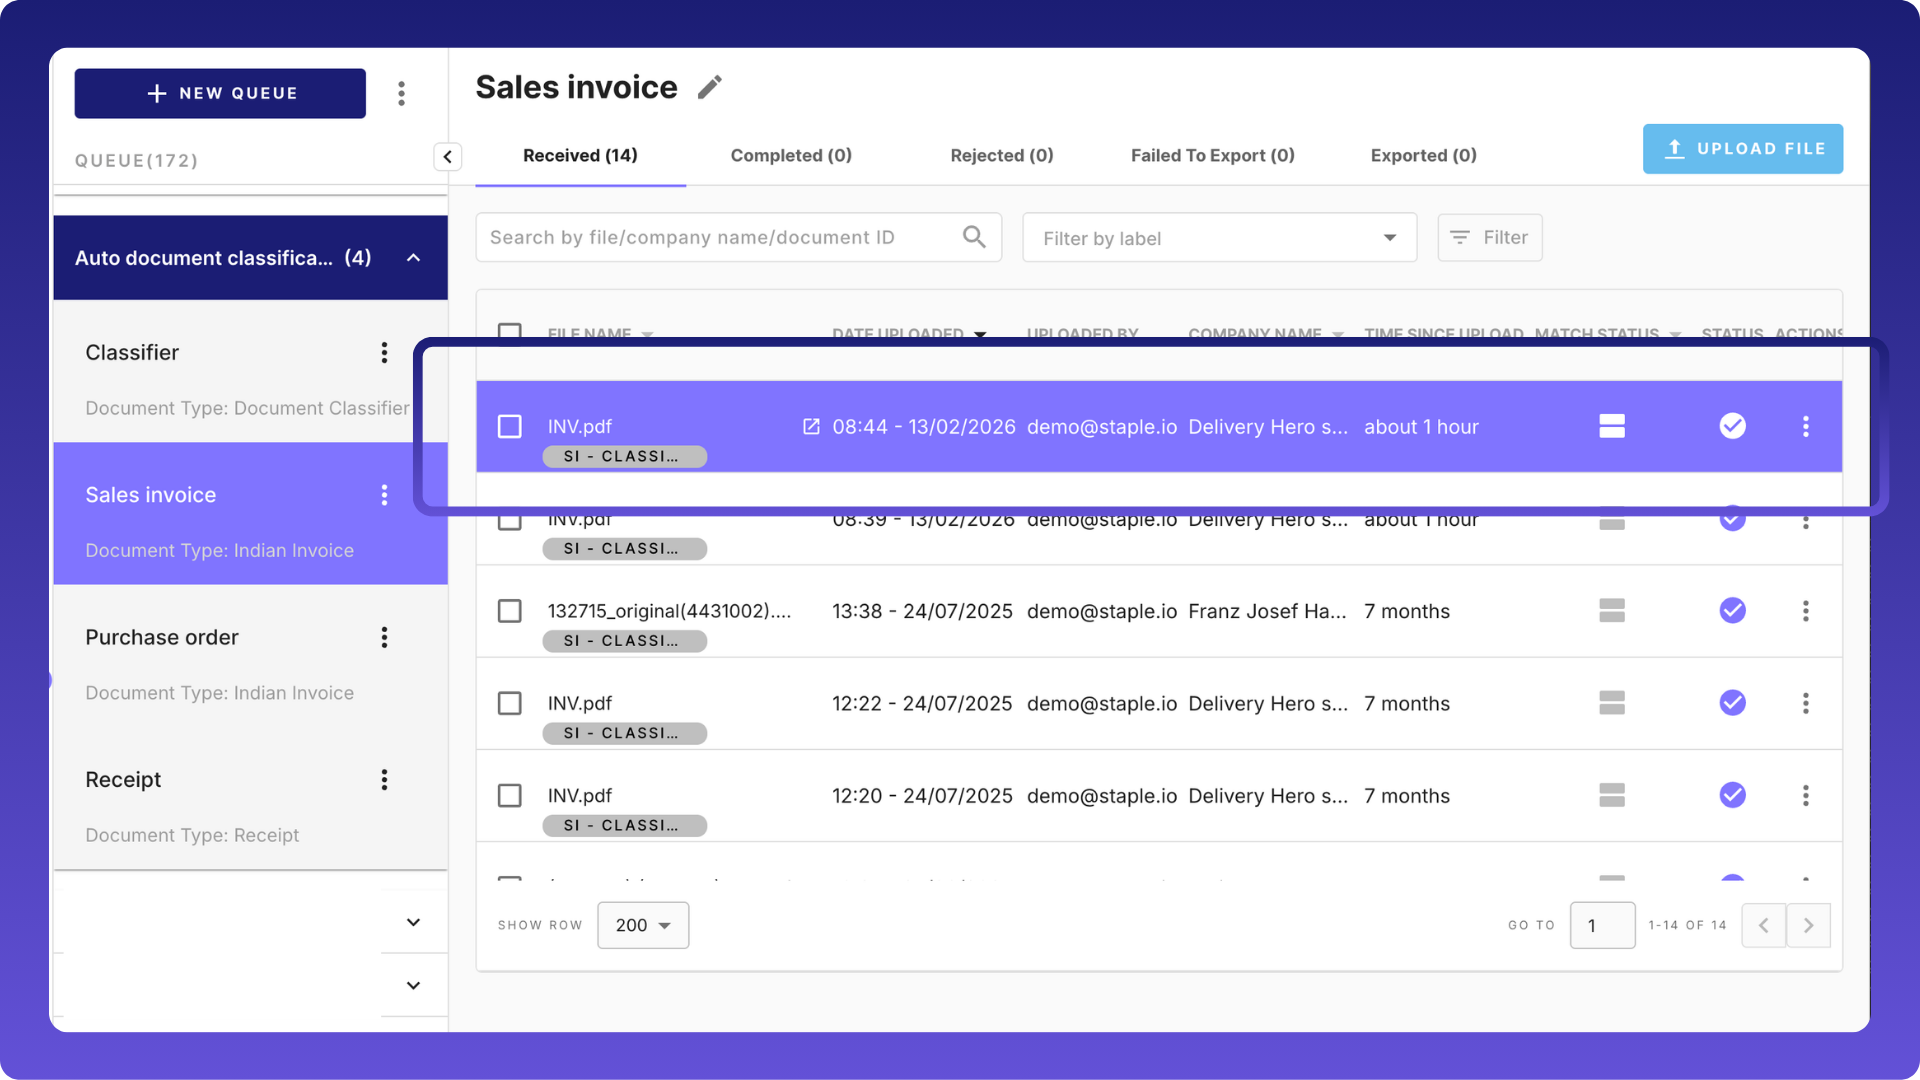
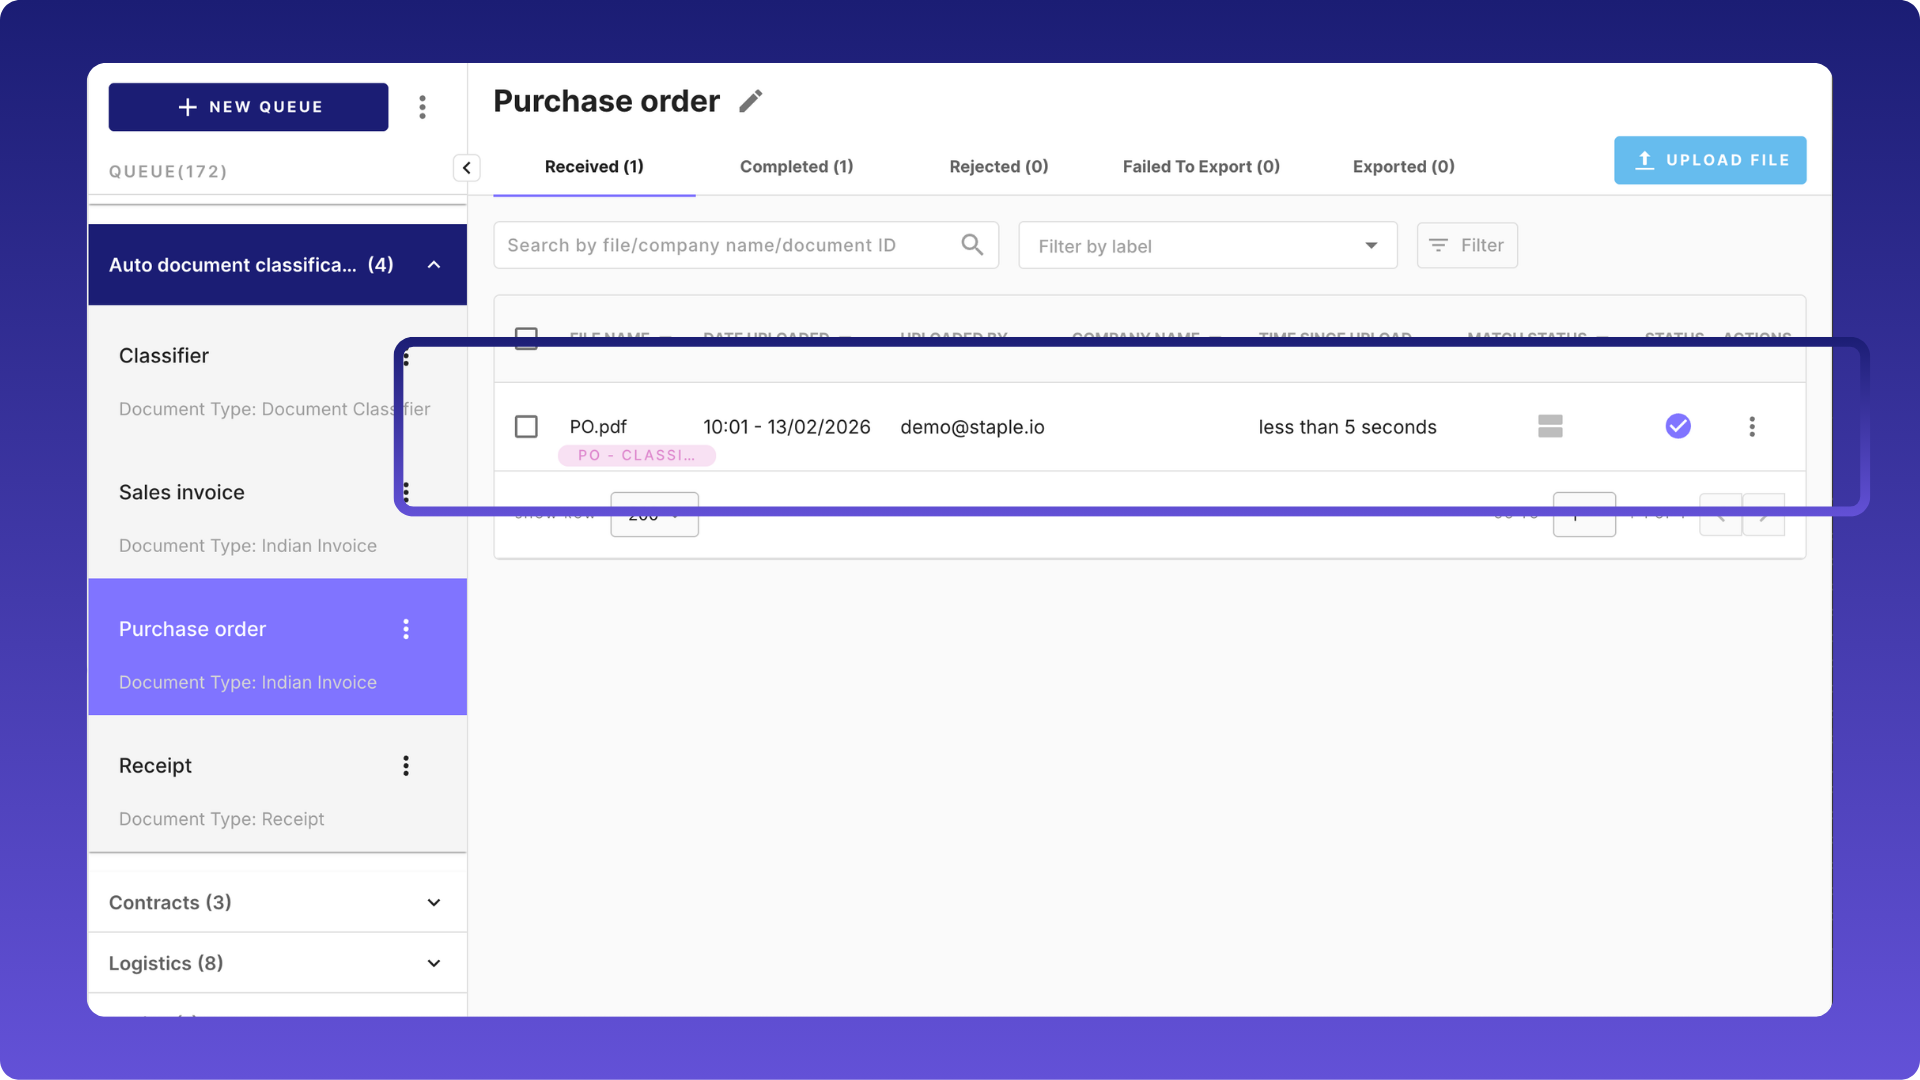
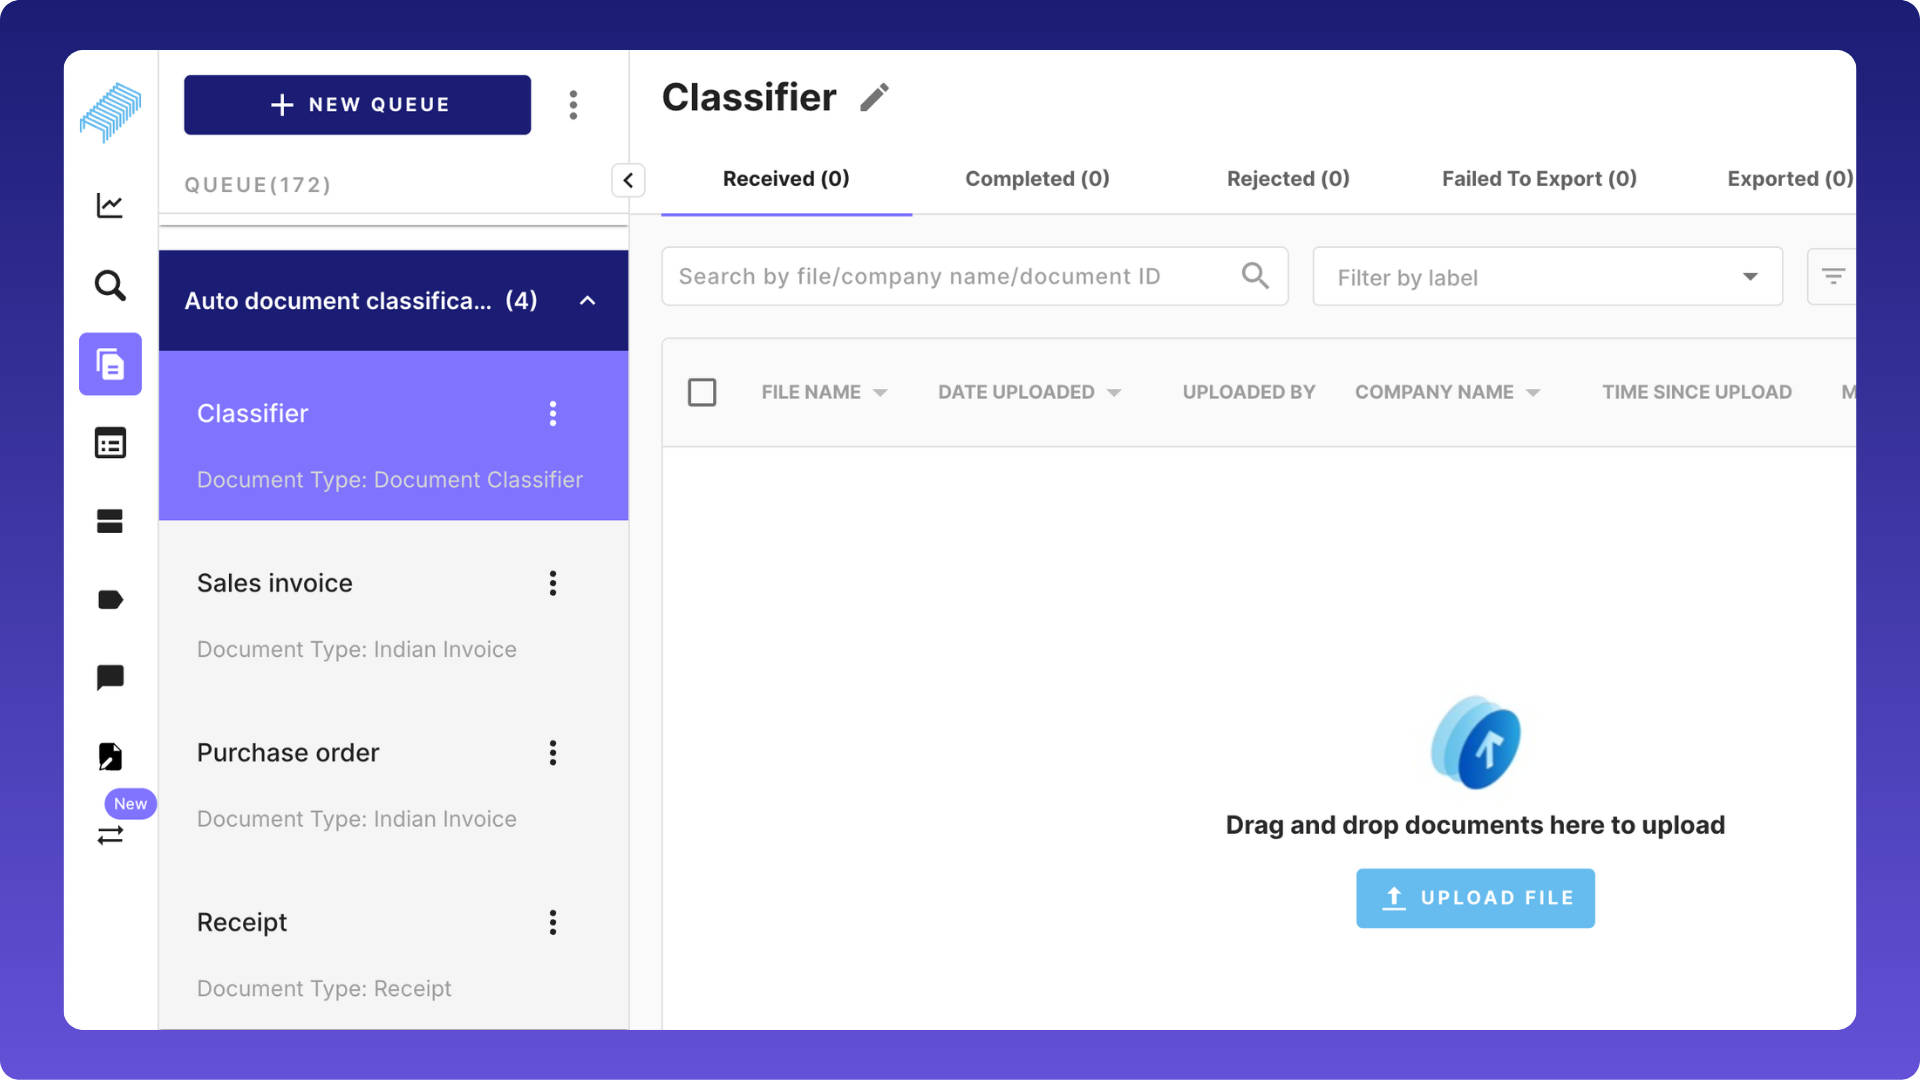
Create four queues, namely, Classifier, Sales Invoice, Purchase Order, Receipt. When we upload documents into the classifier, they'll be automatically classified and moved to the respective queues.

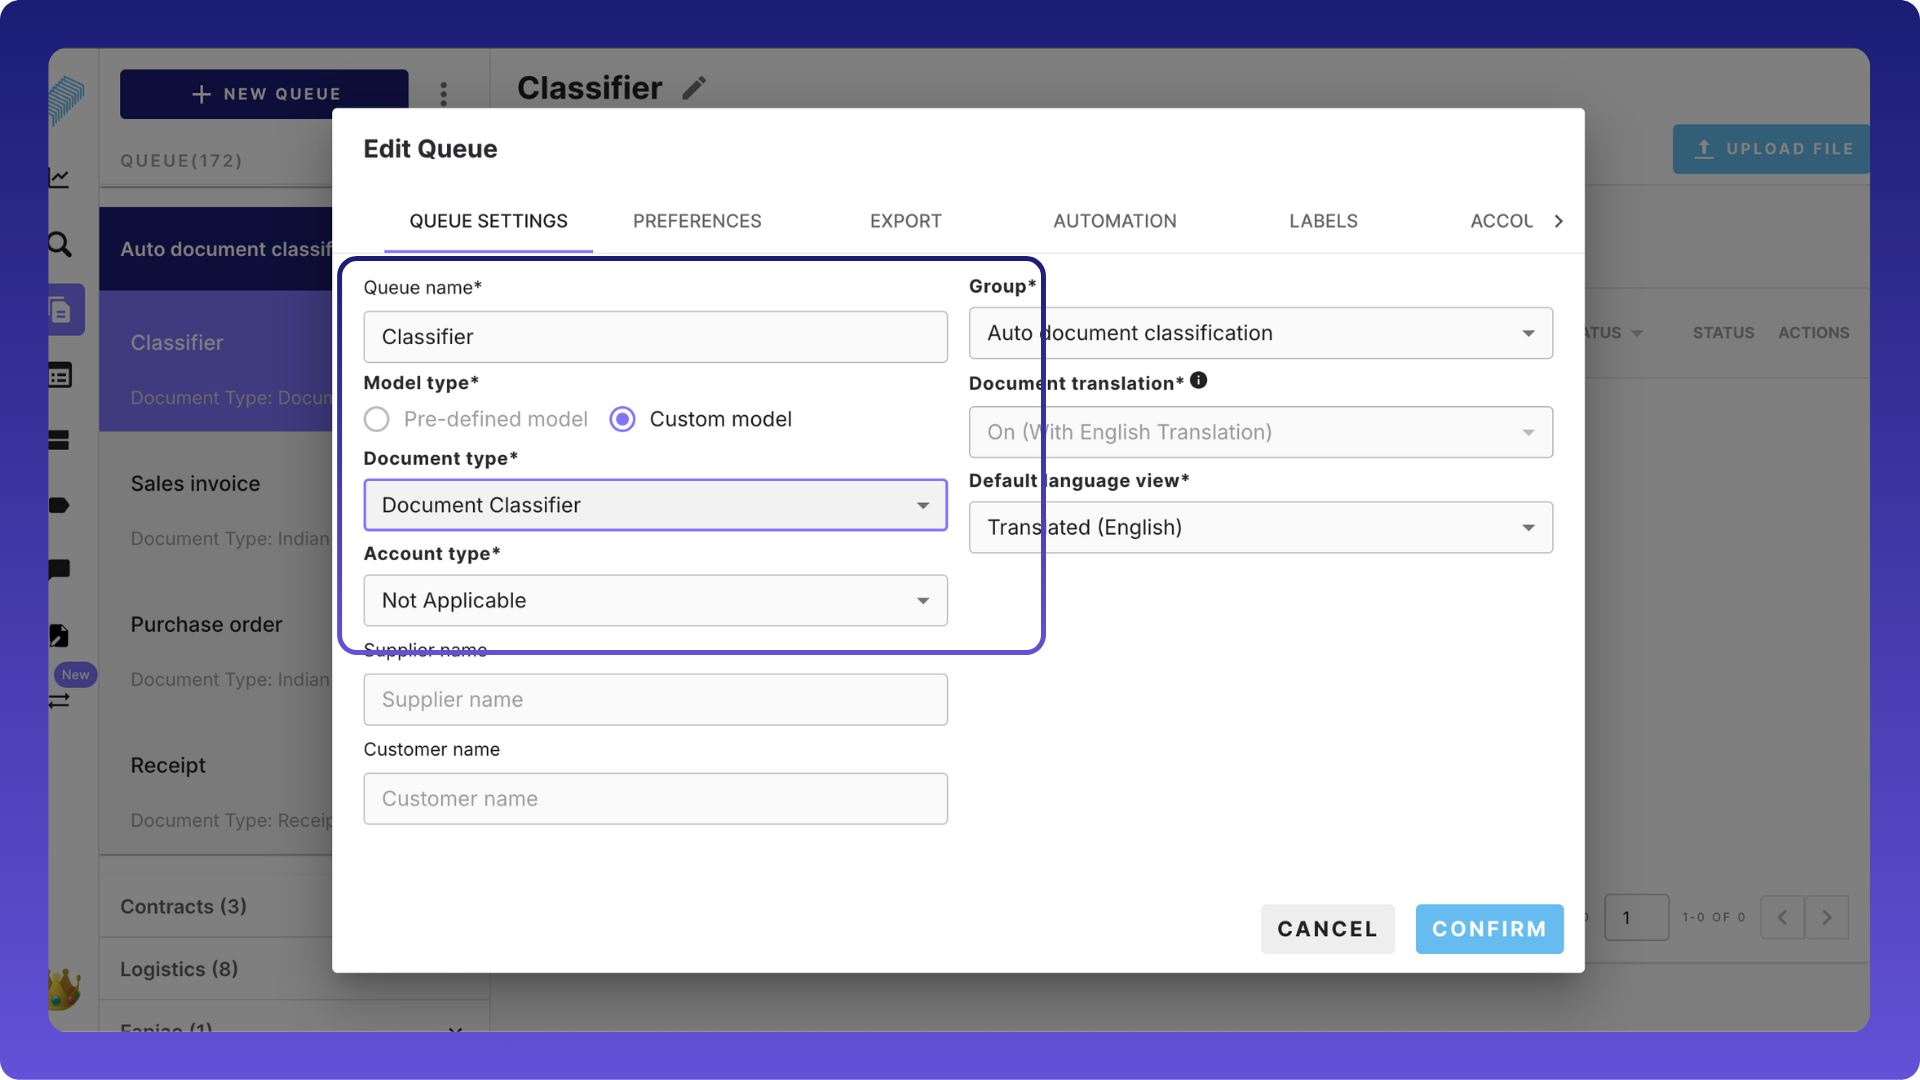
In the classifier queue settings, make sure the custom model is "Document Classifier," which we had created earlier.
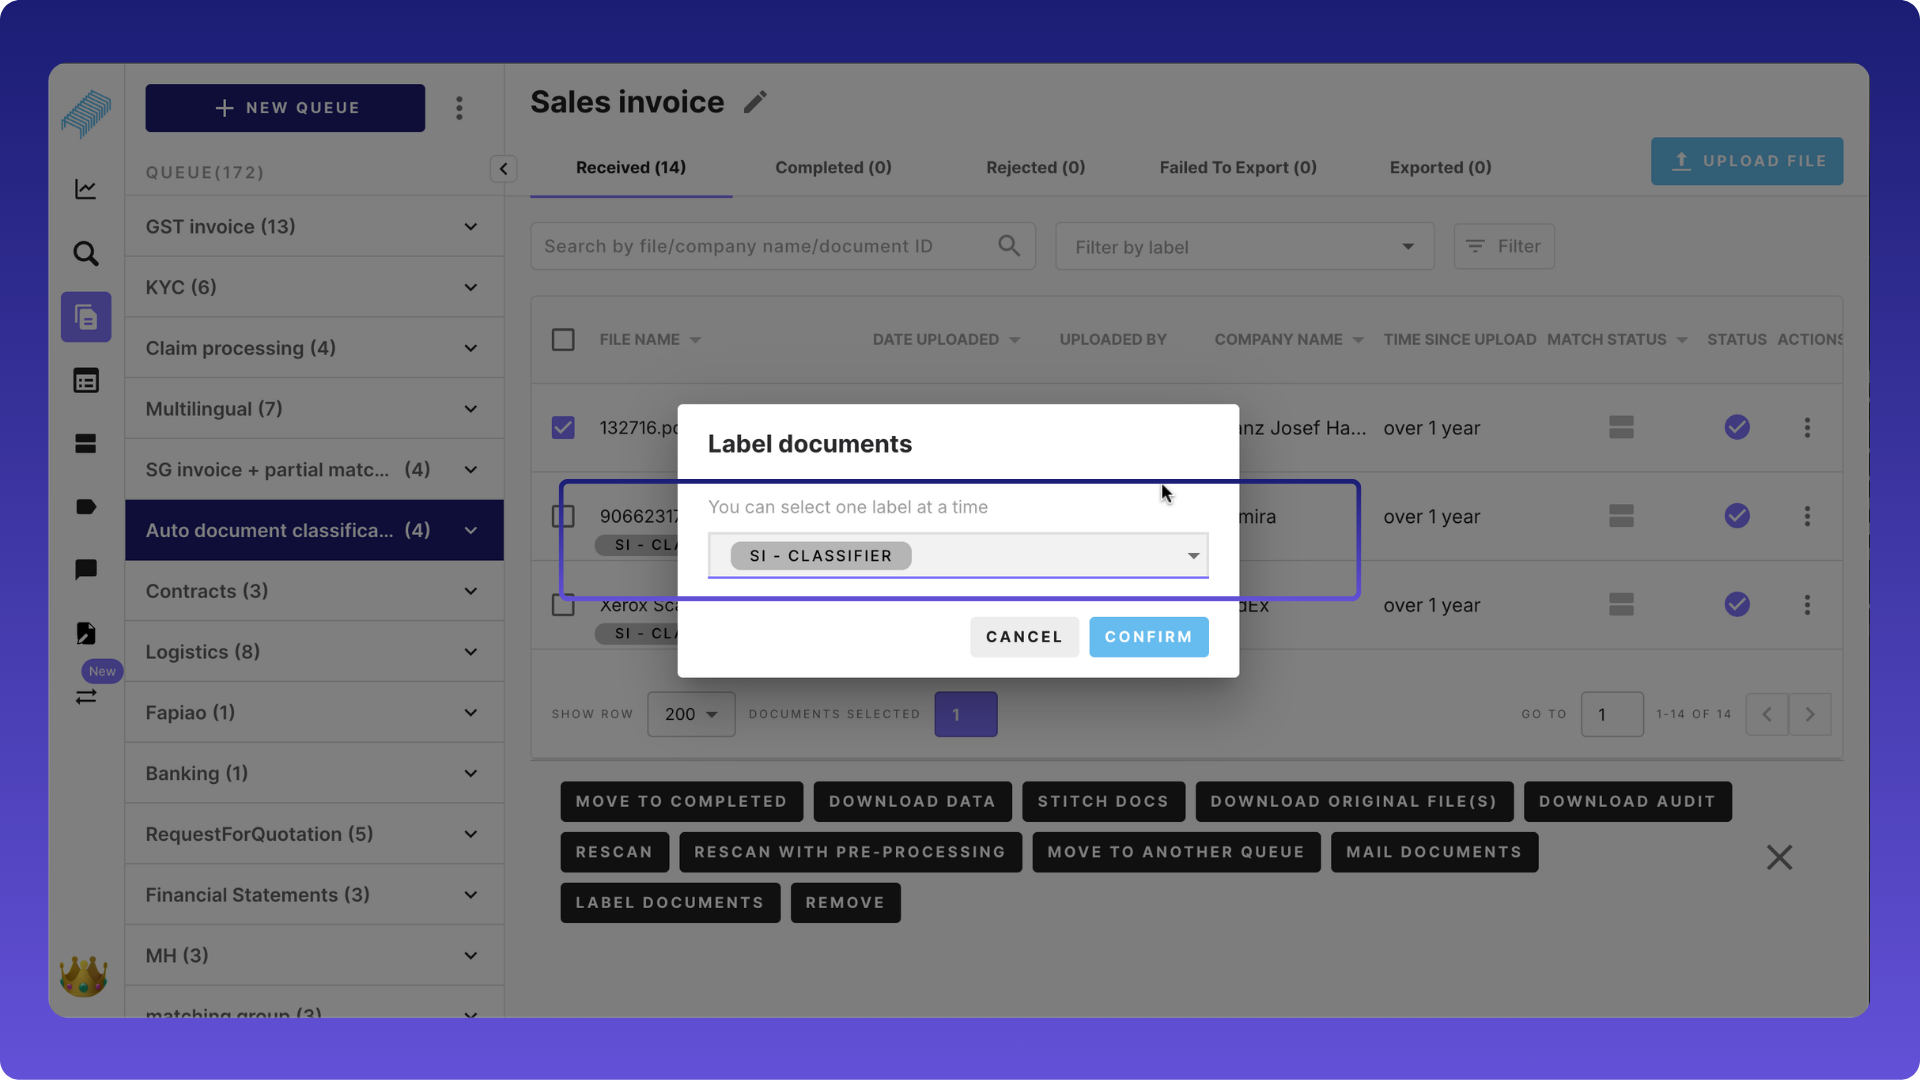
Create Labels
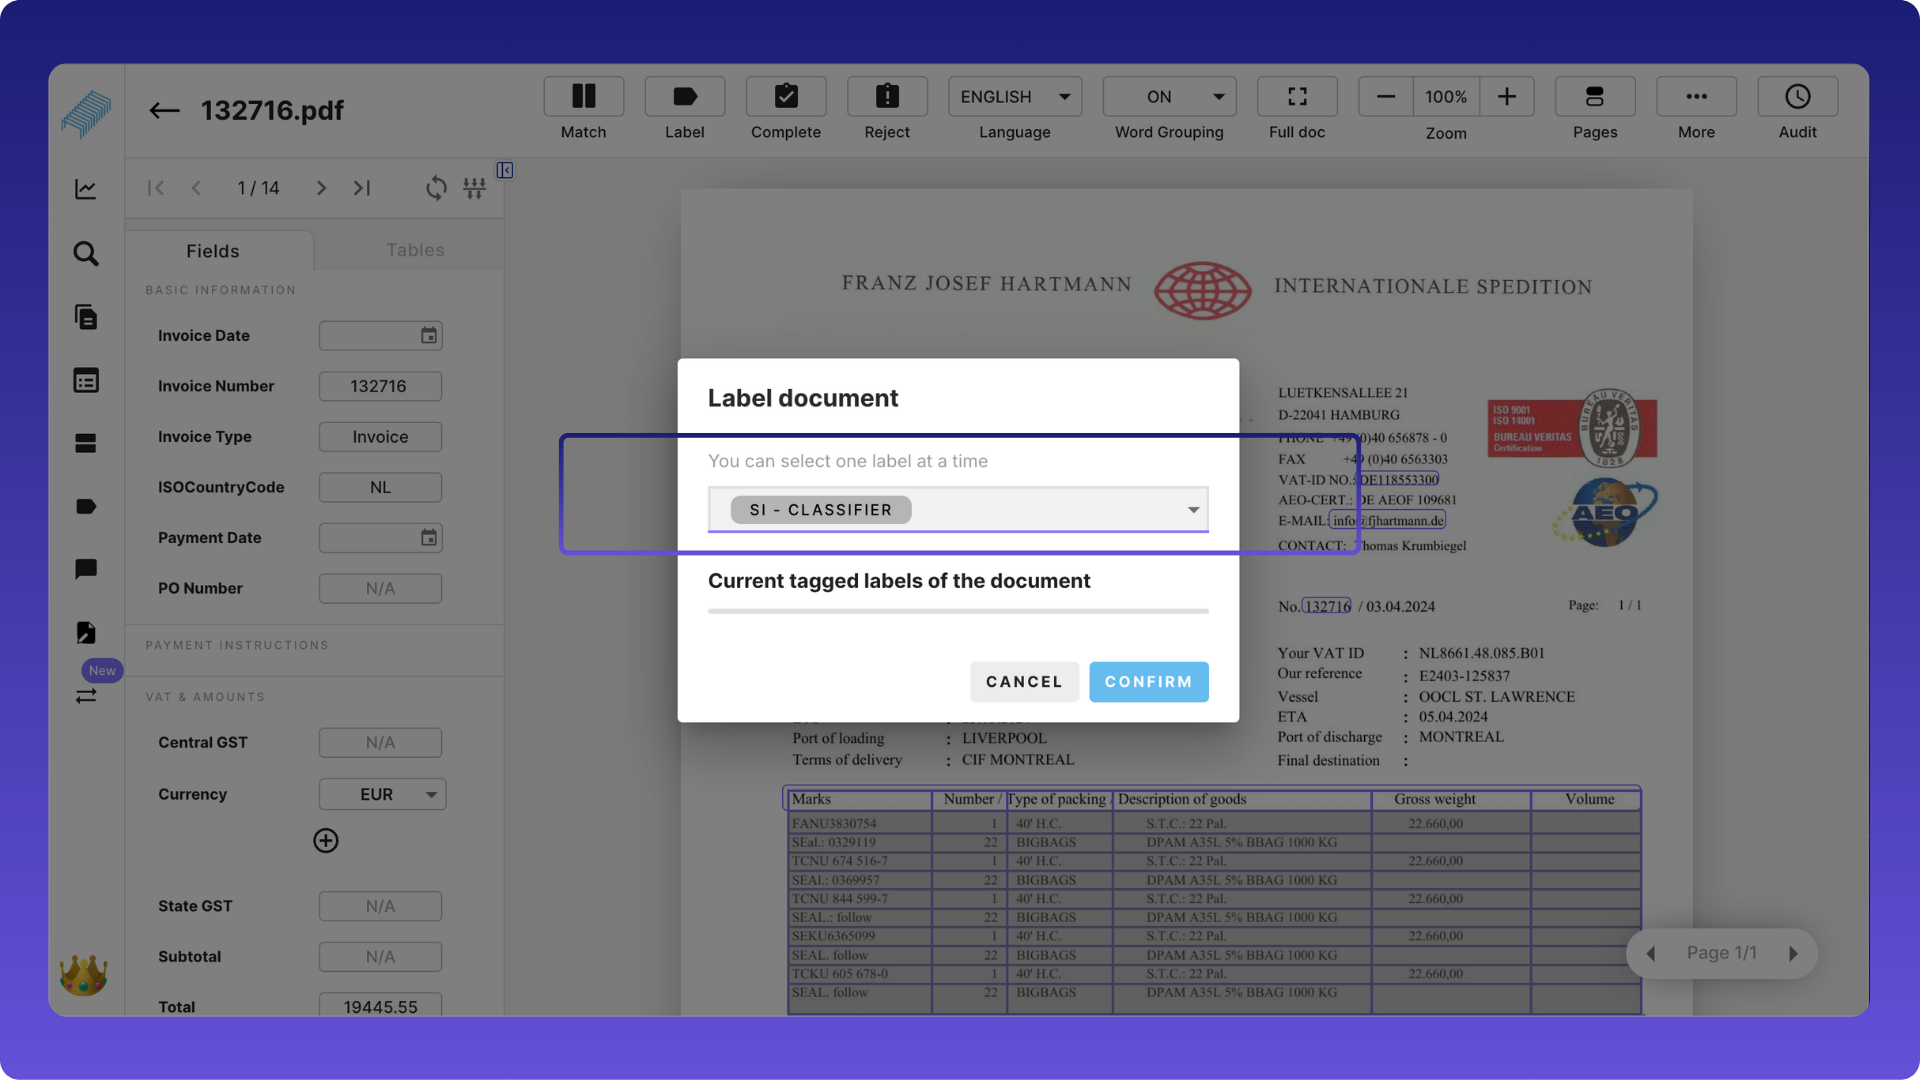
Go to Labels and create a label for each document type. Click "+New Label" in the right corner of the screen. These labels are tags that, when applied to a document, trigger an automatic action. Delete and edit labels using the options under the "Actions" column.
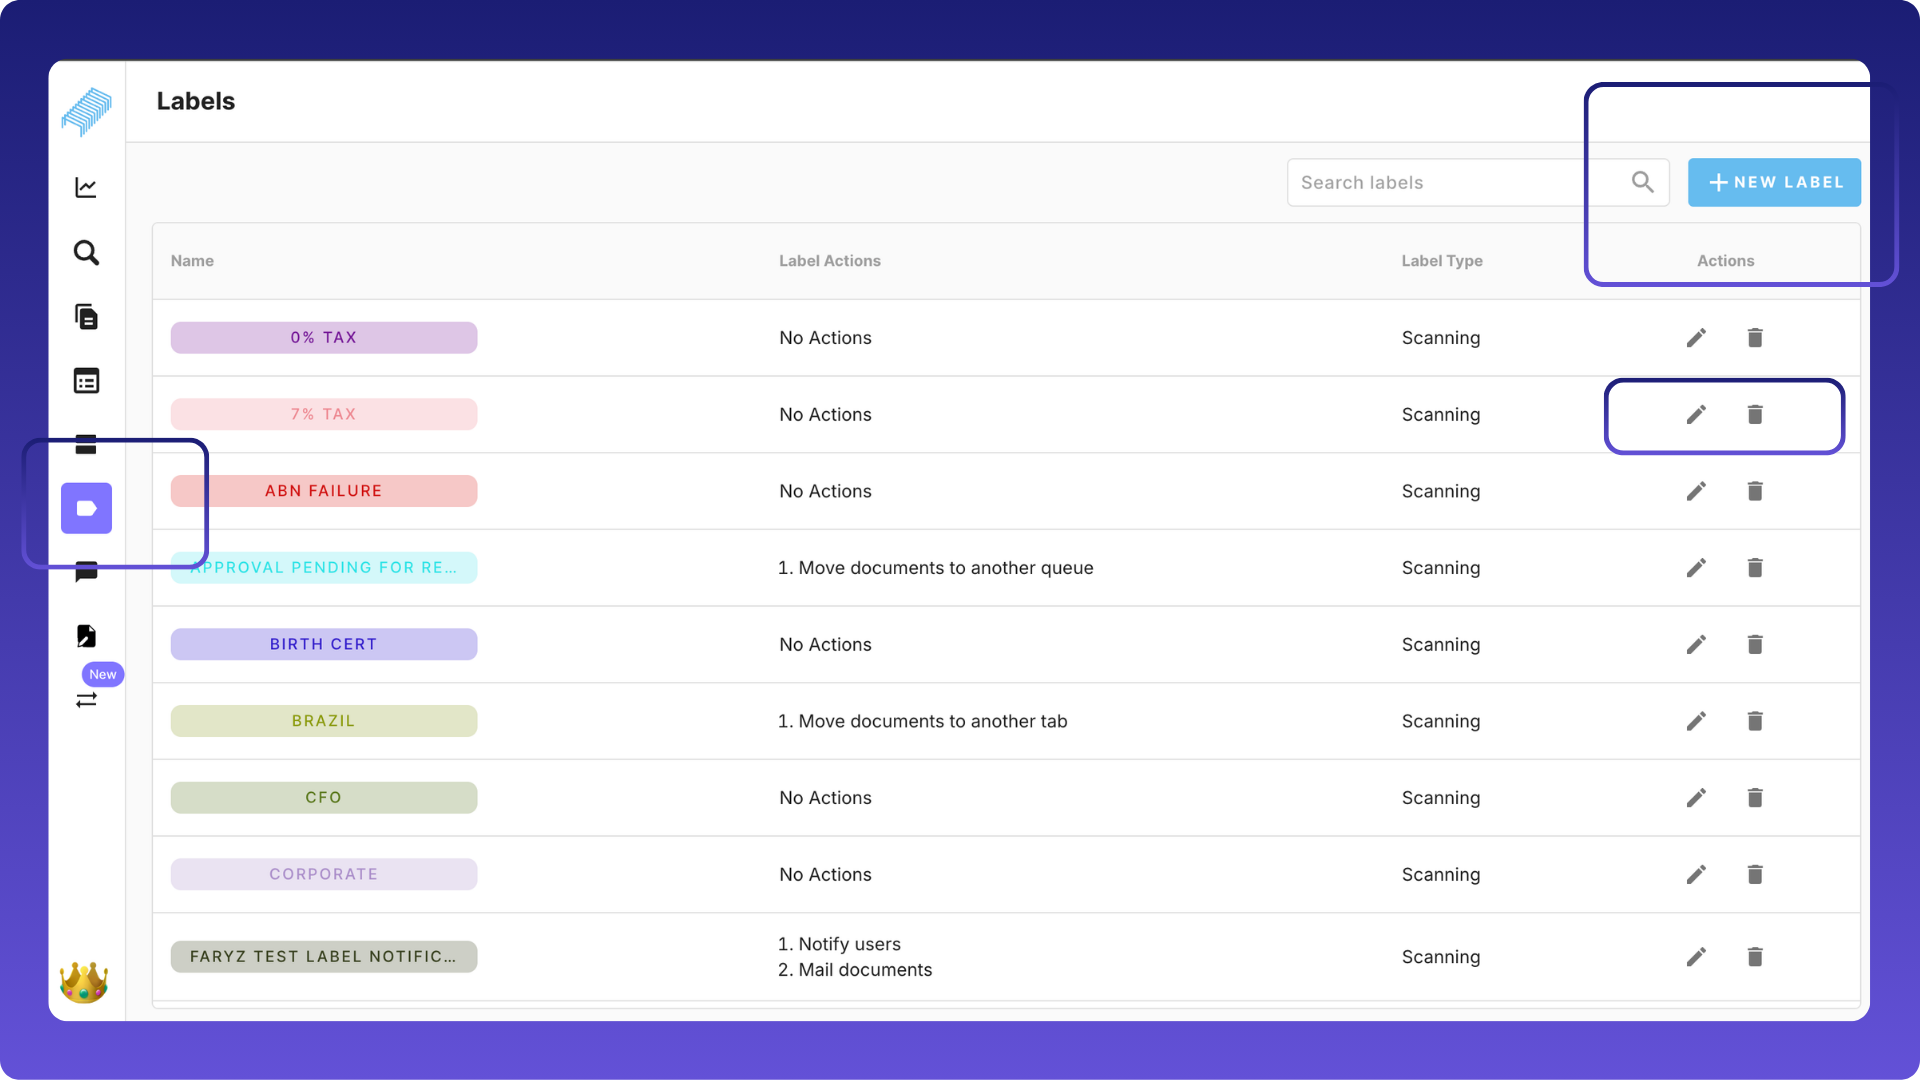
Create a label to tag sales invoices.
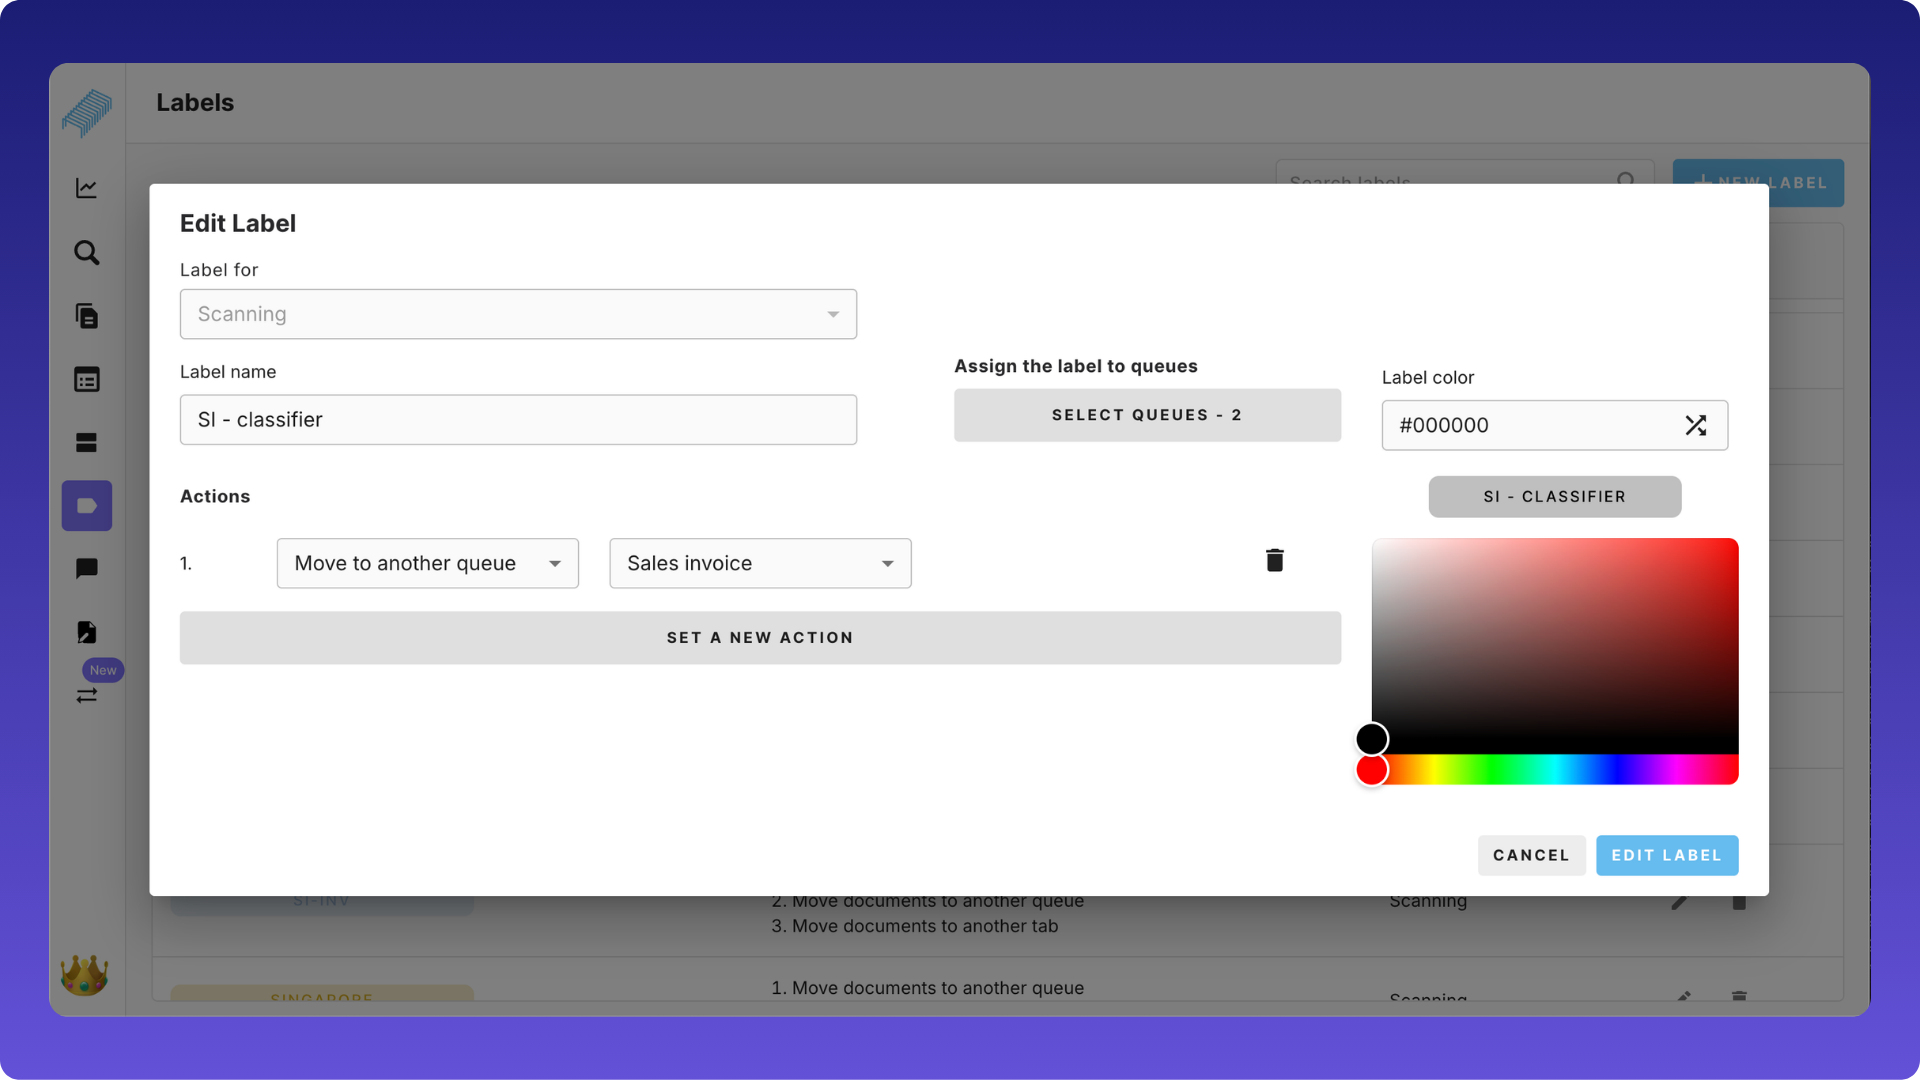
- Give a label name, say, SI - Classifier
- In the "Assign the label to queues", choose the two queues involved in this scenario, namely, Classifier and Sales invoice
- Then, choose the action you'd like to automate, which is "Move to another queue" --> Sales invoice. Set a colour of your choice to differentiate labels
- After we save the label, when we apply the label "SI- Classifier" to documents in the Classifier queue, they will be automatically moved to the Sales invoice
Likewise, multiple options can be set when a label is applied.
- Move the document to another queue
- Set approval workflows
- Move to another tab
- Notify a specific user
- Send an email to a user
- Trigger a webhook
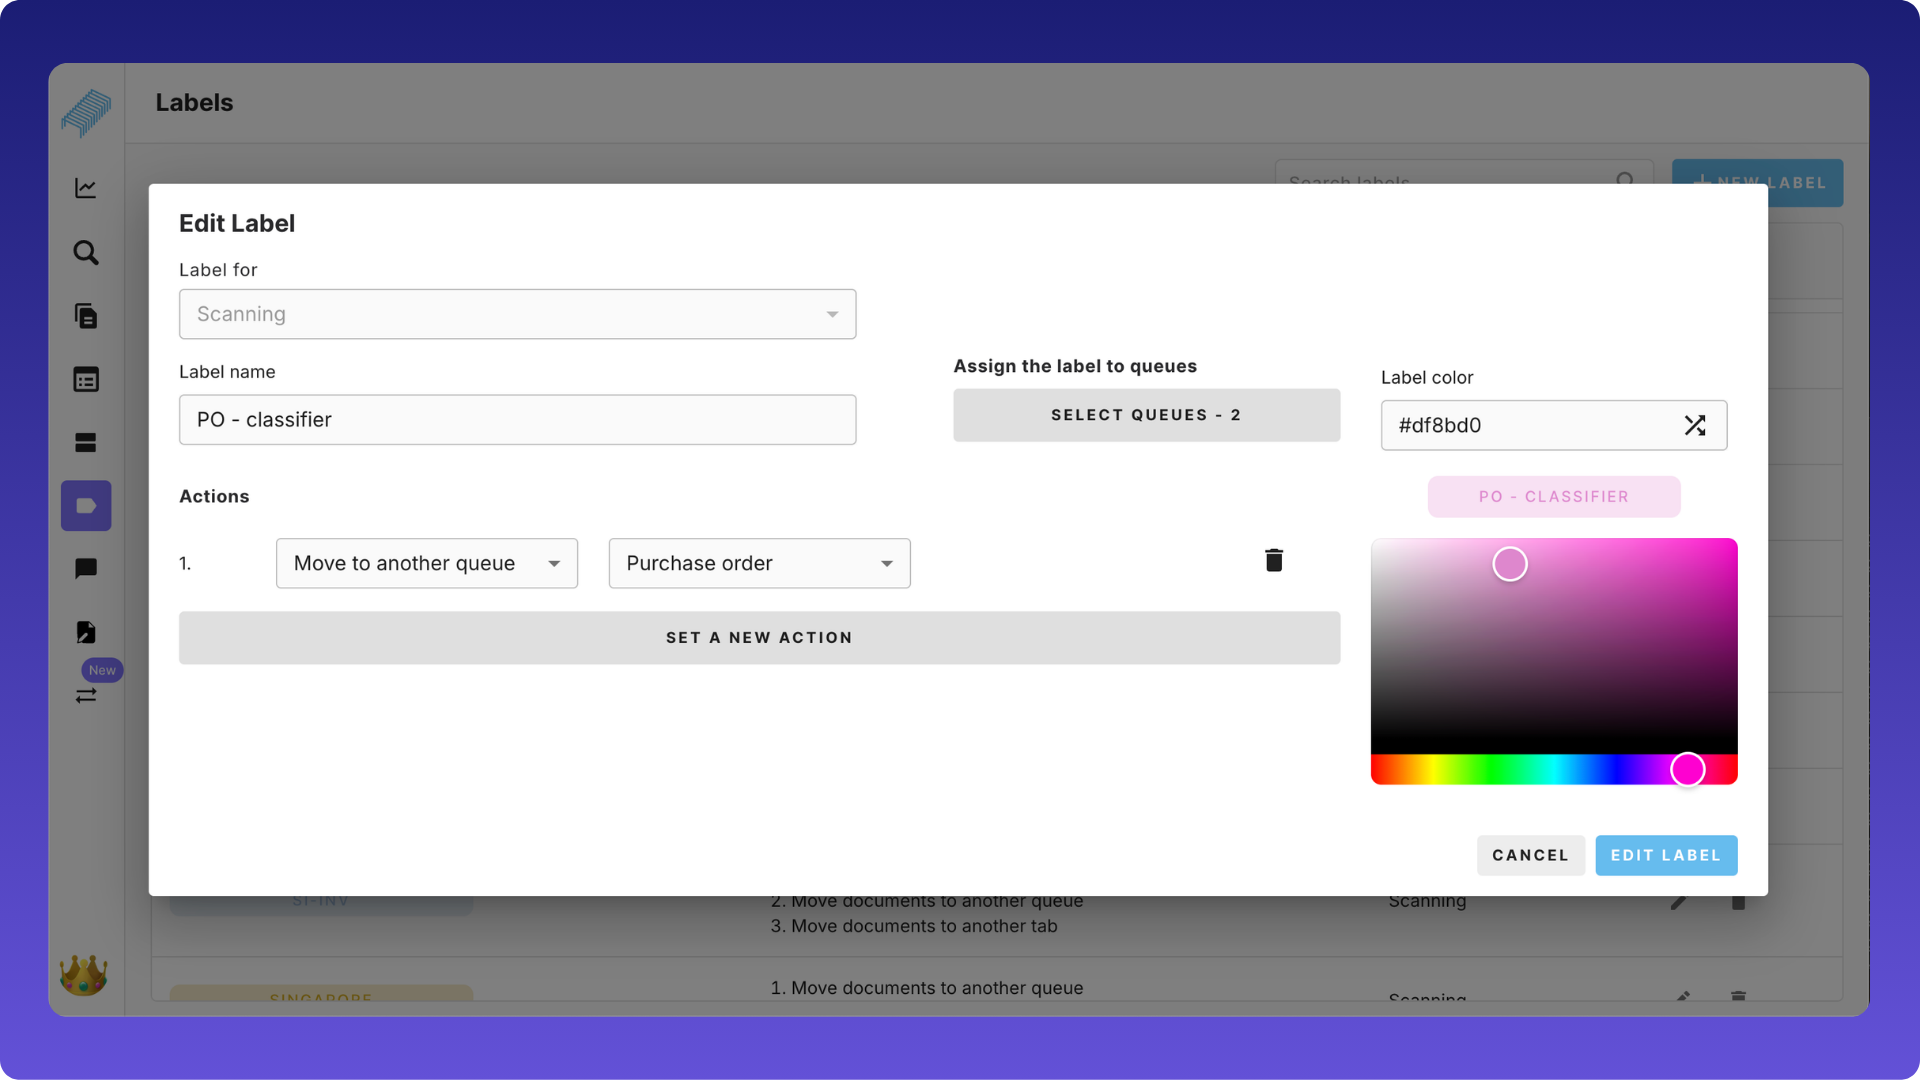
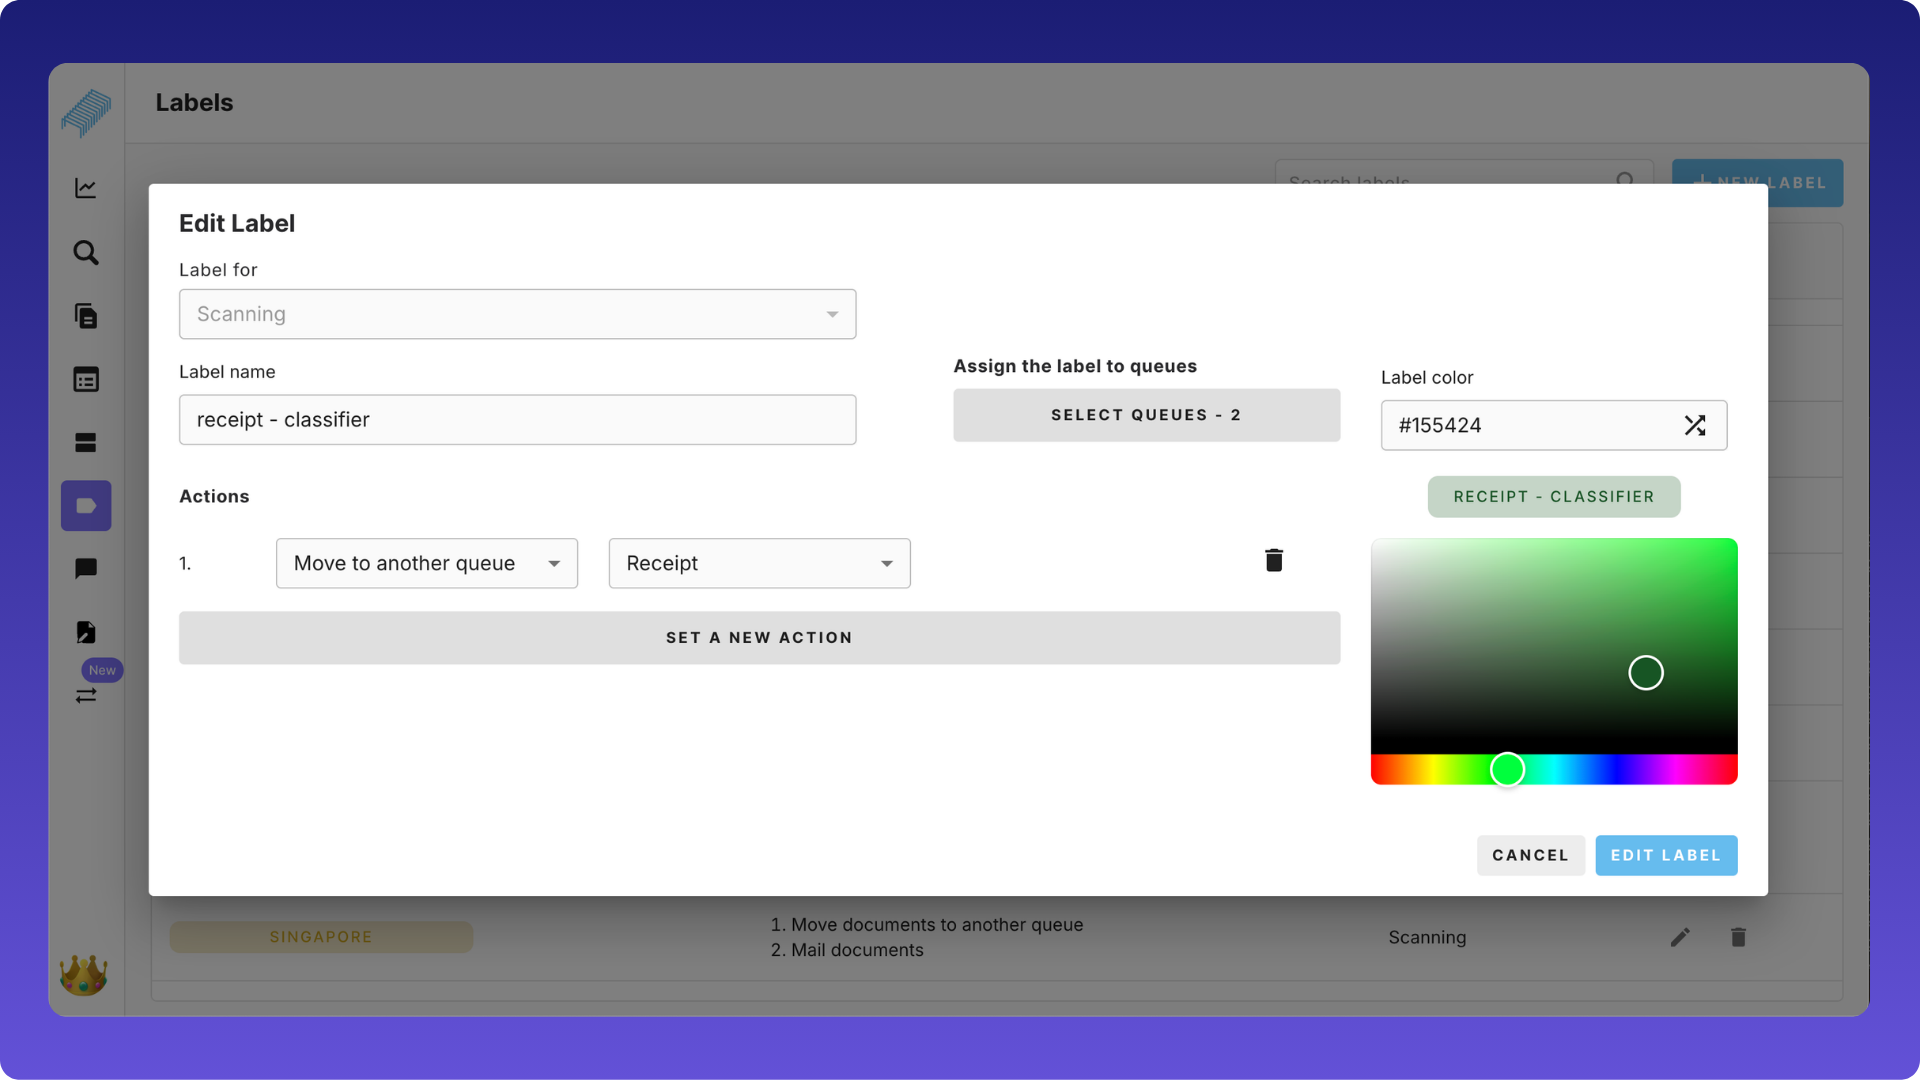
Likewise, create two more labels for classifying purchase orders and receipts.
Define rules
Navigate back to the Classifier queue. Rules help us apply labels automatically. Post which, the entire flow becomes automatic.

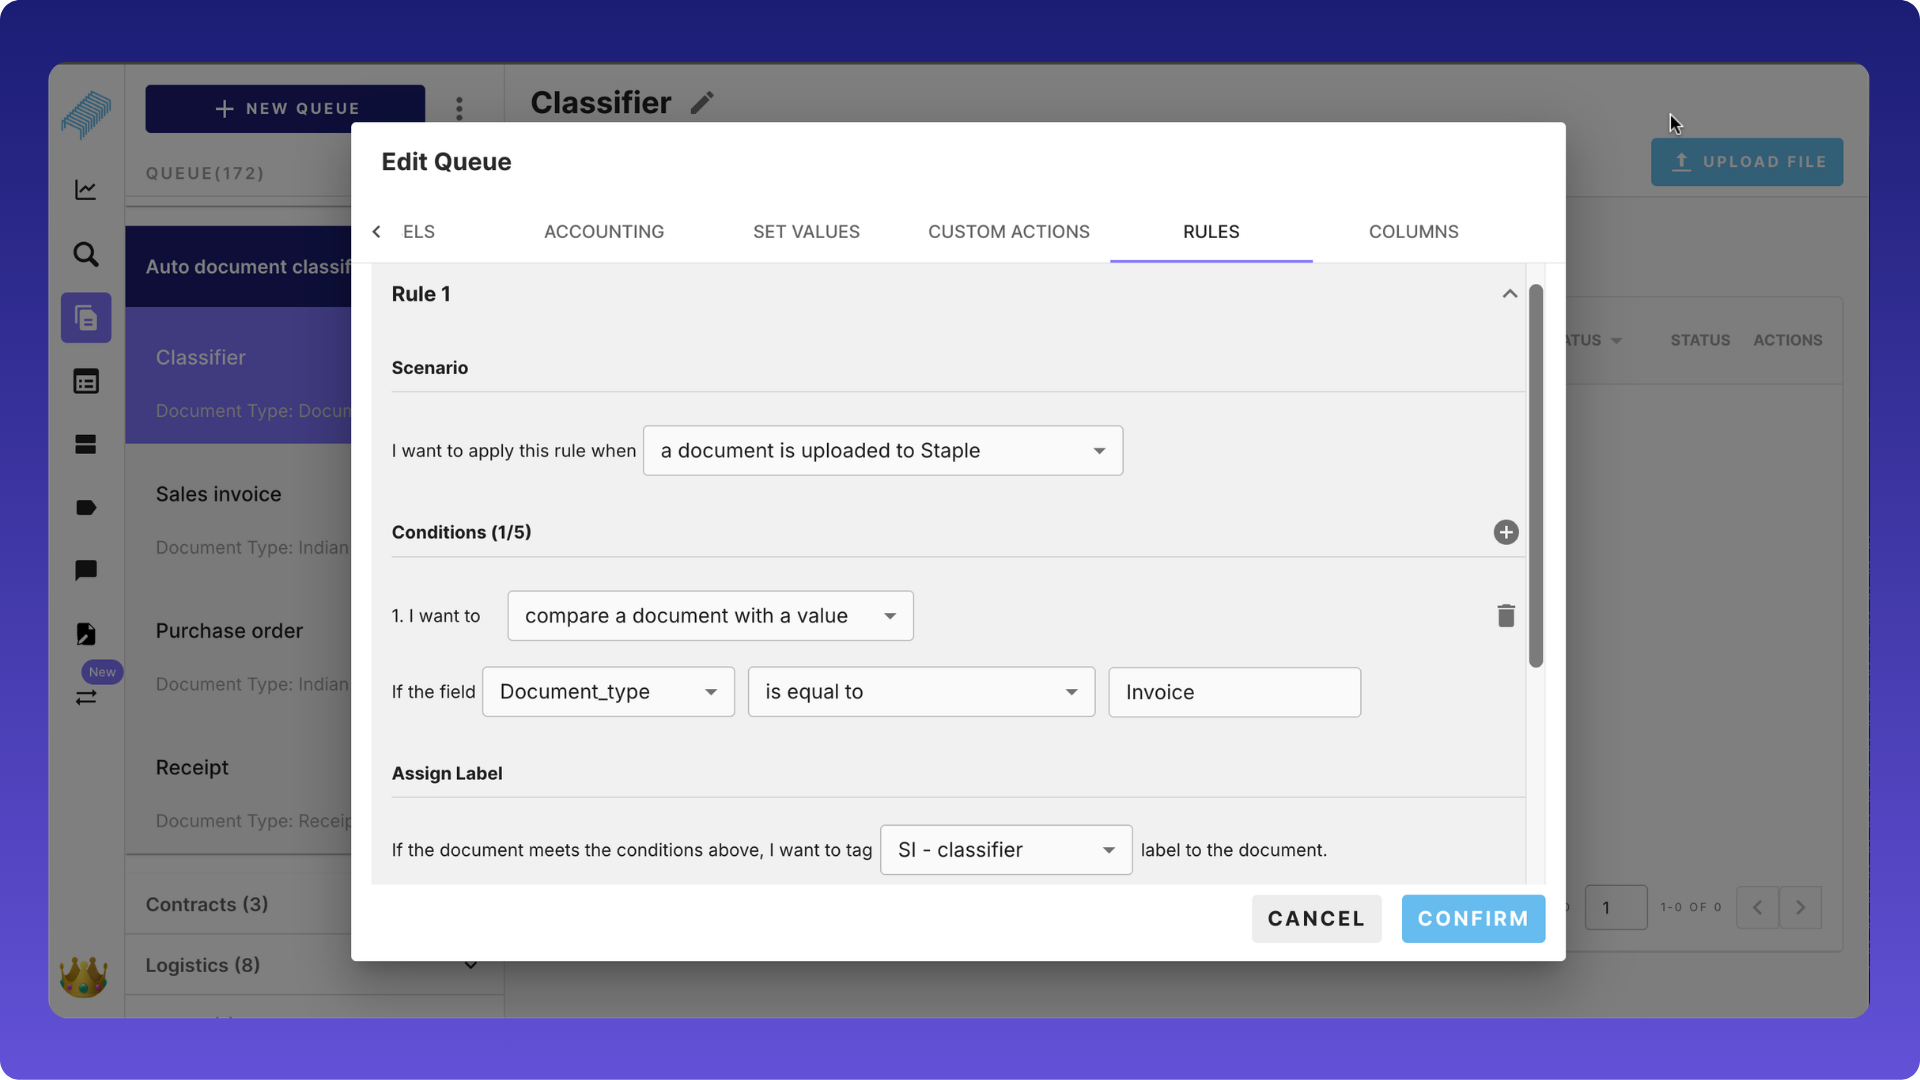
In the queue setting of the "Classifier queue", scroll to the "Rules" section. First, set rules for classifying sales invoices.
- Define three elements: scenario, conditions, and assign label. This will help apply the label automatically.
- Scenario (When do we want to apply this rule?): In this case, it has to be applied when a "document is uploaded to Staple."
- Condition (when the rule is triggered, what would you like to do): In this case, the tool needs to check if the value of the"Document_type" field is "Invoice."
- Assign label (Conditions are set, now which label would you like to apply): In this case, when the above conditions are met, the "SI-classifier" should be applied.
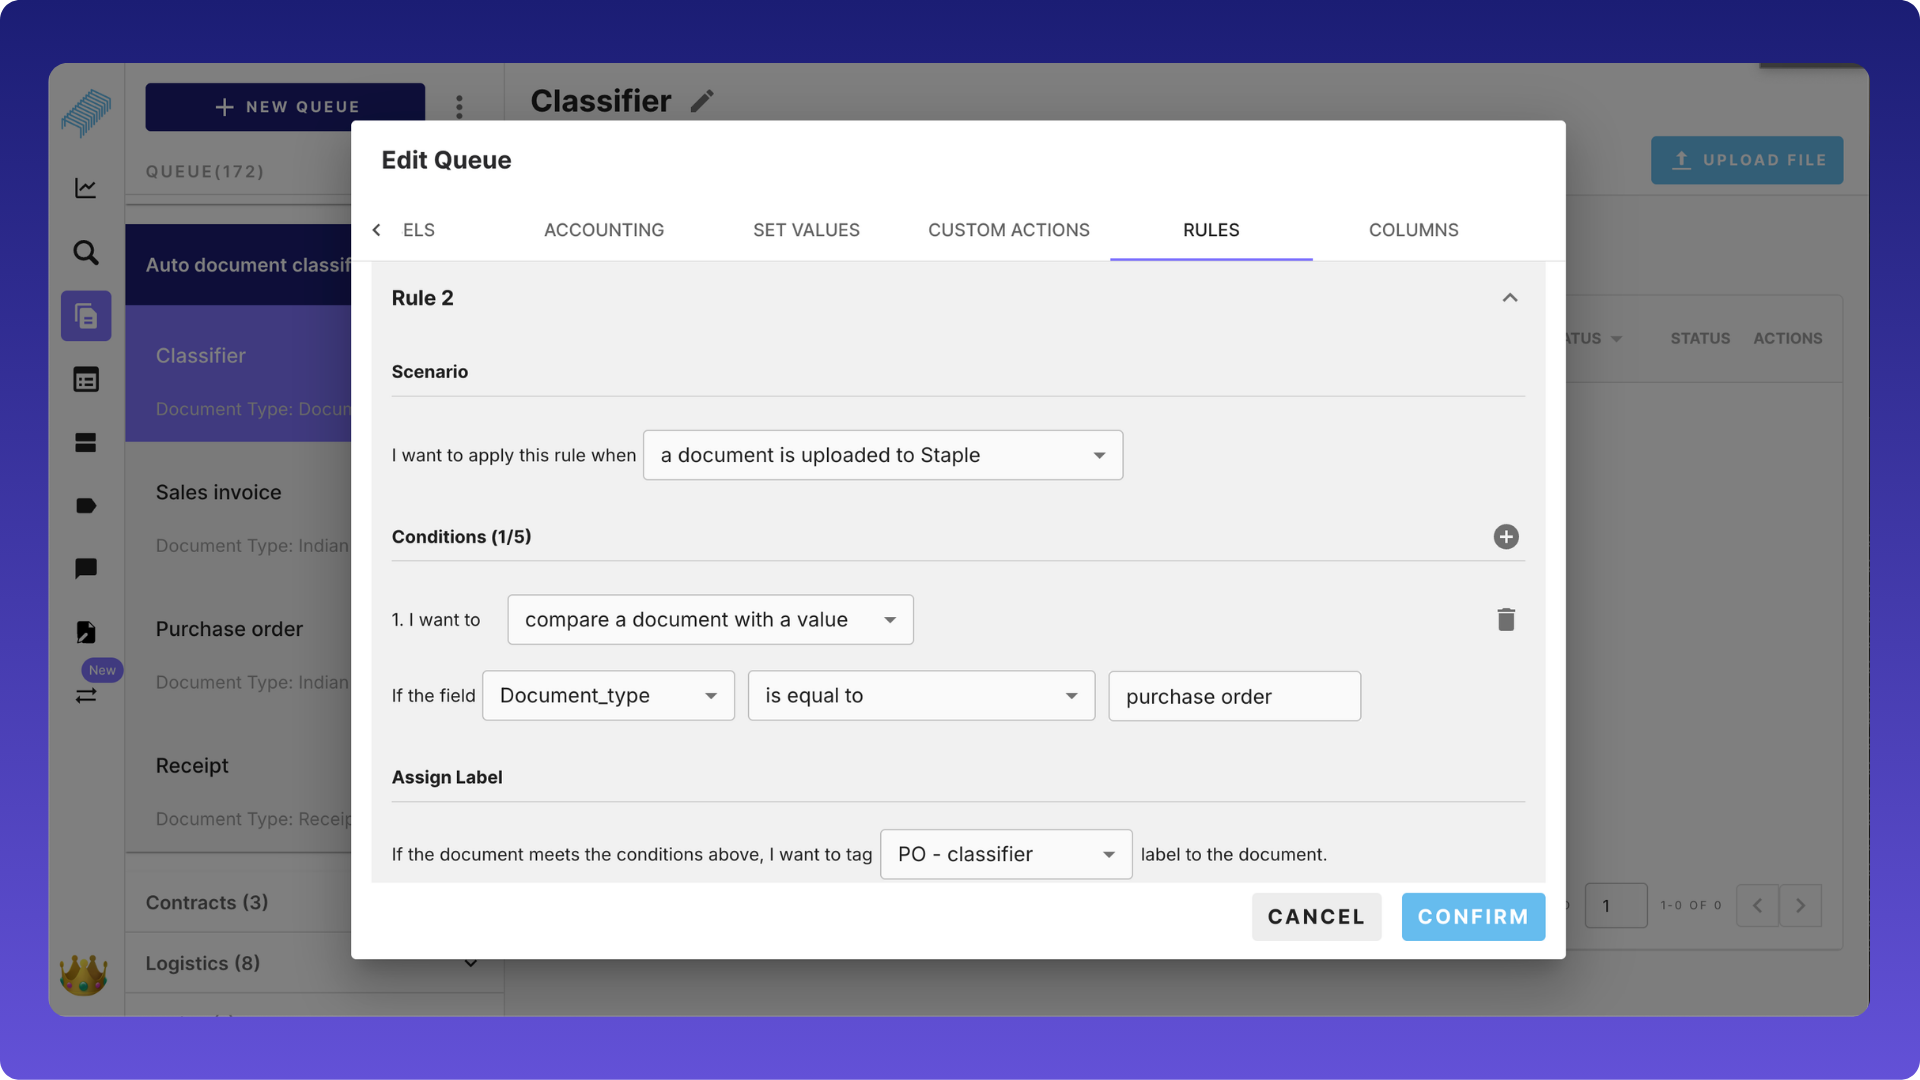
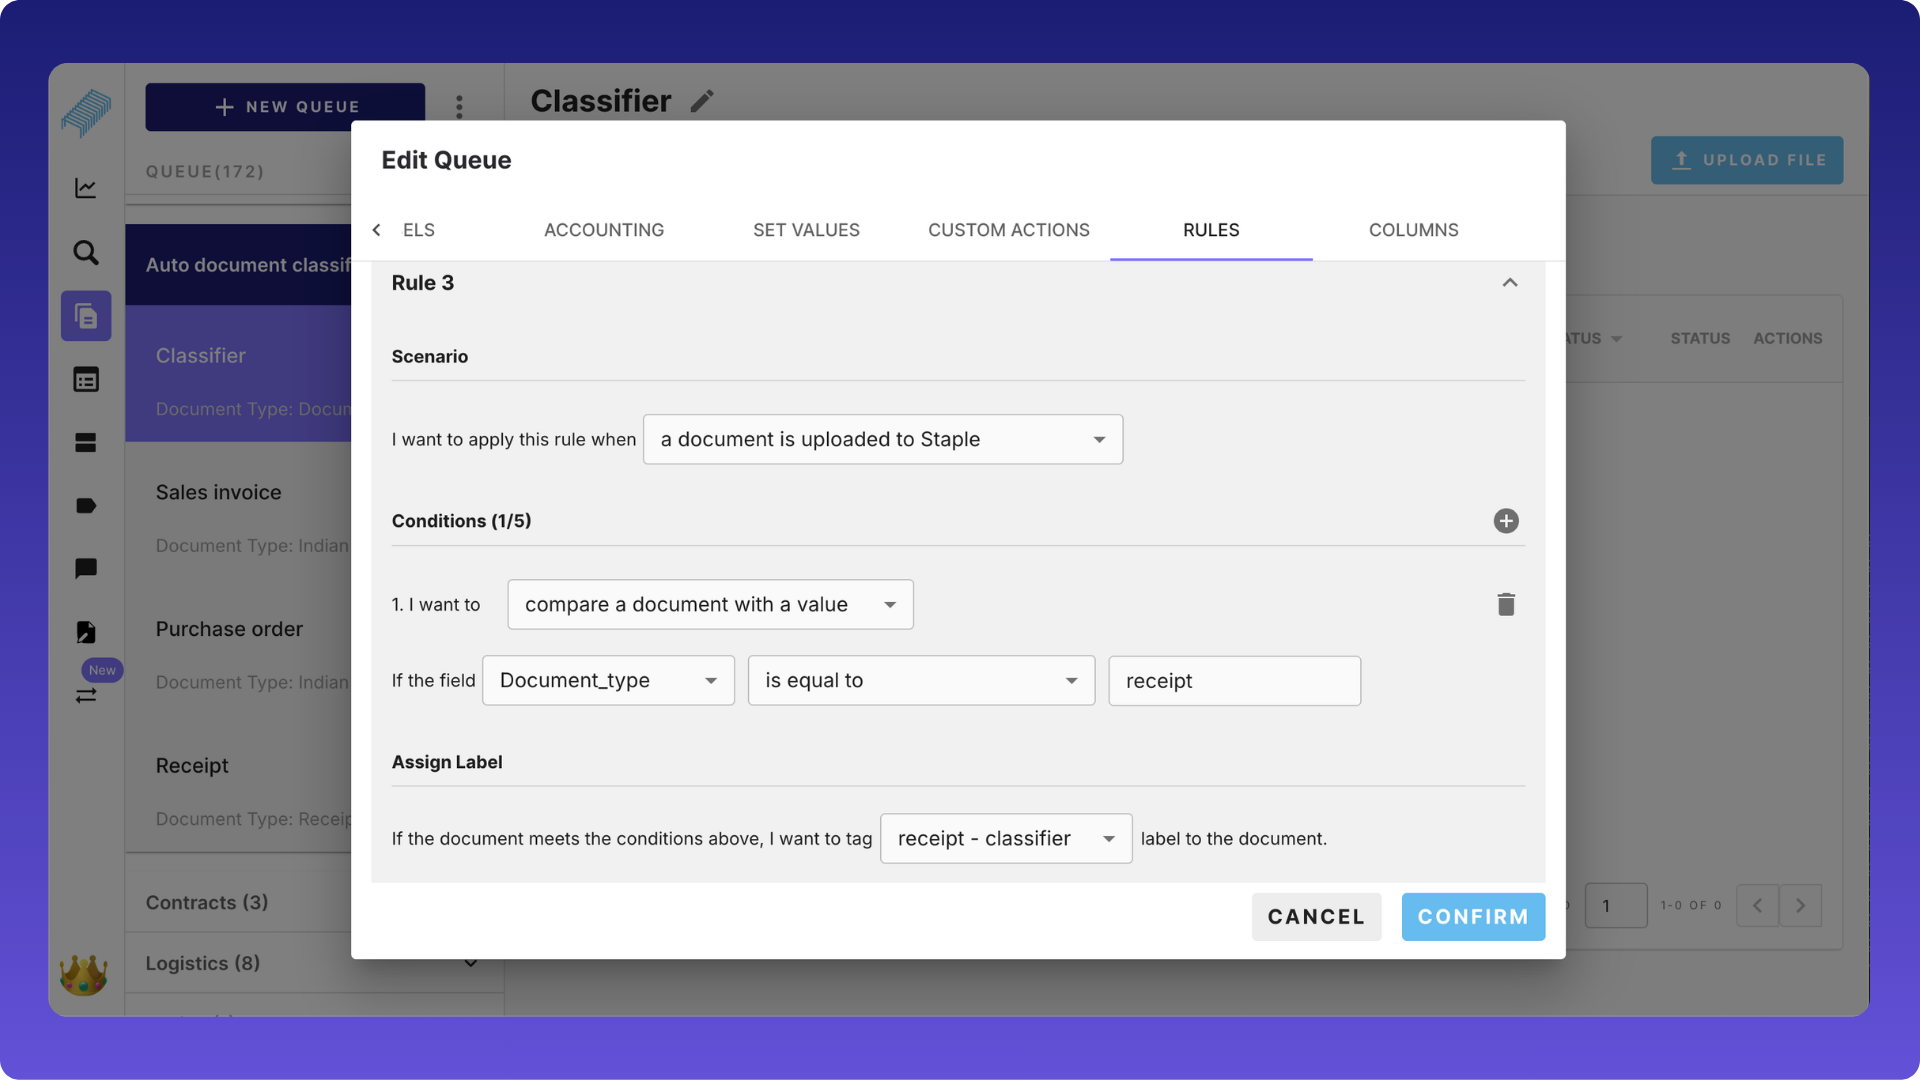
Create rules for classifying purchase orders and receipts.
Upload and auto-classify documents
Once configured,
- Upload invoice, purchase order, and receipt to classifier queue.
- The system automatically identifies the document type.
- The correct label is applied.
- Document moves to the appropriate queue.
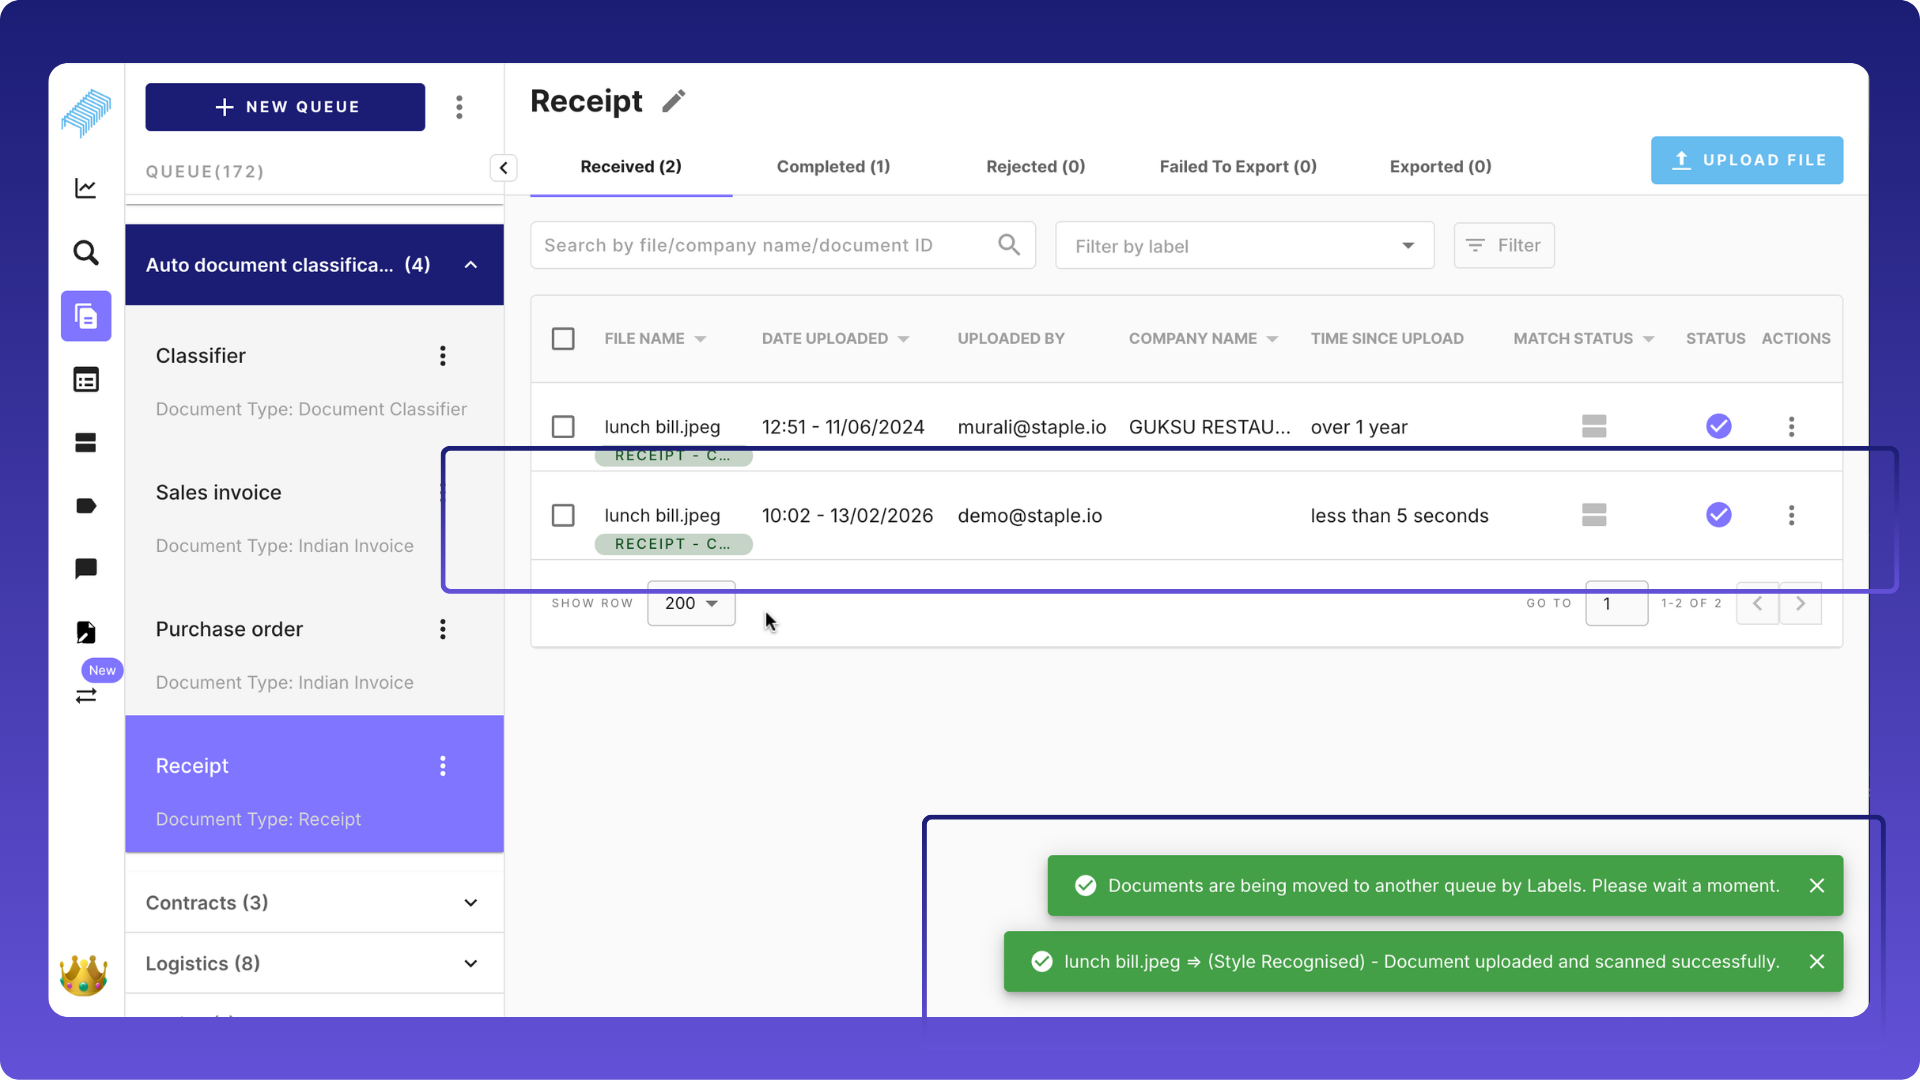
Receipts, when uploaded to the "classifier queue," automatically move to the "Receipt" queue. Please note that the label "RECEIPT - C..." is automatically applied to the "lunch bill" receipt.
Likewise, Invoice and purchase orders are automatically classified and moved to their respective queues.
The classifier queue will appear empty because documents are automatically routed.
Other ways to classify documents
1. Semi-automatic classification
Apply labels to a document in the scanning screen as well as in queues
2. Label documents without Action
Apply labels without any action. This is useful for tagging and filtering

%201.png)